![]()
Caddy
Shack
Visitor # since 19.SEP.2001
![]()
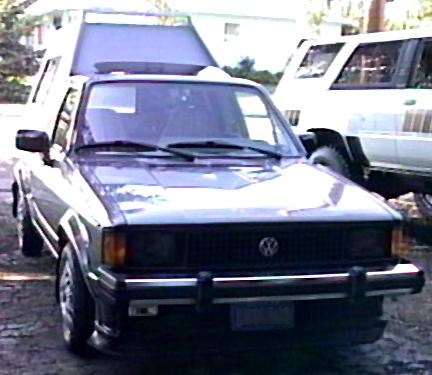
Soon after buying my '81 Caddy, I really found that I wanted a shell to cover the bed. I searched come camper shell dealers and found that only a cab-high shell was available on special order for about $800. I had seen pickups in my area that had a taller shell and that was what I really wanted
So, I sat down and worked up a design for a shell (or Caddy
Shack as it has come to be known). I own a 7HP TroyBilt
roto-tiller and wanted the shell to be high enough to allow the tiller
to fit in back. That set the floor to ceiling height at 48". I
wanted the shell to roughly match the body lines of the cab, so the
side walls are tilted in at about 10° and the front edge tilts
forward at 15° to fit the rear of the cab. For ease of
construction, I kept the side walls flat, although matching the curve
of the body would not be much more difficult.
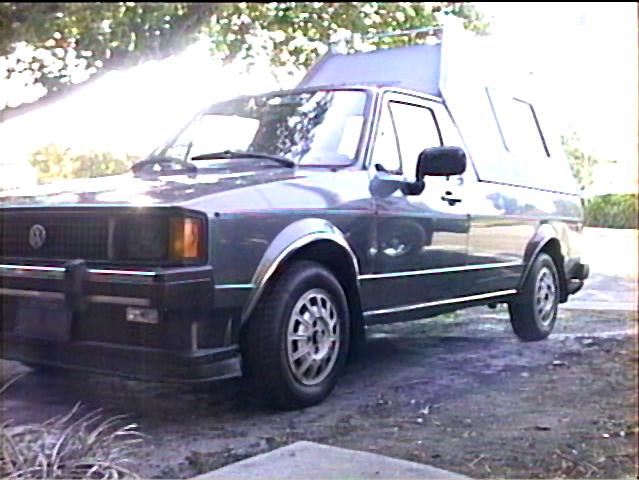
I wanted to make it light enough to install and remove by myself. I find if I put my shoulders up against the roof at the balance point, I can stand up and carry the shell fairly easily. The only hard part is lifting it up high enough to clear the bed.
The shell is constructed on a frame of 1x2 lumber covered with a 1/4" mahogany plywood skin. For weather proofing, the plywood is covered in a polyester fabric and rubberized paint designed for mobile home roofing. The paint only comes in a black undercoating and a white top coat. I found the rough texture on the white retained too much dirt so I added a bit of the black to the white to make a light gray color. This coating has held up will in 5 years of use. I do plan on applying a second layer of fabric to cover a few surface imperfections that were not covered by the first layer.
 Here,
you can see a detail of the front corner. For attaching the shell to
the bed, I took a length of 2/4 lumber, carved it to fit up under the
bed rail and then ran some screws down through the rail into the 2x4.
Then, a piece of 1/4 spans the gap from the shell footing to the 2x4 in
the bed rail. To top is beveled to match the angle of the sidewall and
then screws are used to attach the 1x4 to the shell and 2x4. For extra
safety, I also used metal bracing strips at the front and back. In
addition, the screws that attach the 2x4 to the bed rails protrude
upward and fit into holes I drilled into the shell base, making for a
very secure attachment.
Here,
you can see a detail of the front corner. For attaching the shell to
the bed, I took a length of 2/4 lumber, carved it to fit up under the
bed rail and then ran some screws down through the rail into the 2x4.
Then, a piece of 1/4 spans the gap from the shell footing to the 2x4 in
the bed rail. To top is beveled to match the angle of the sidewall and
then screws are used to attach the 1x4 to the shell and 2x4. For extra
safety, I also used metal bracing strips at the front and back. In
addition, the screws that attach the 2x4 to the bed rails protrude
upward and fit into holes I drilled into the shell base, making for a
very secure attachment.
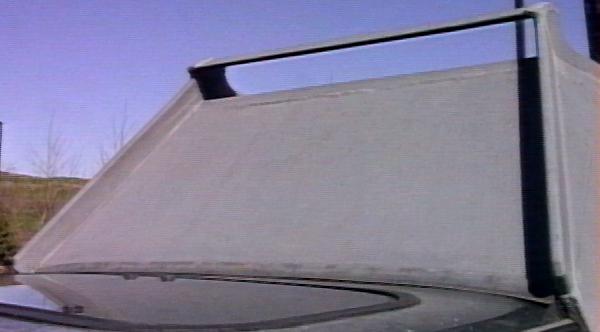
I kept the front of the shell open, and plan on installing a sliding rear window to allow access to the rear contents. For bracing, a 1x4 spans the front just below the rear window. You can also see the two 12V power outlets I added for the back. I use one to power the pair of 12V fluorescent lights and the other for accessories, like my 12V coffee pot.
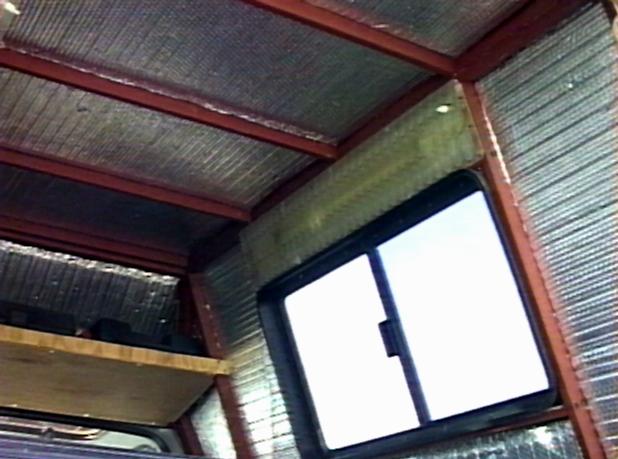 Here
is a shot looking at the side window and wall-roof joint detail. I
built the two side walls and roof panels in separate pieces. The
vertical "studs" were spaced to fit the 15x30" sliding
side windows (ordered from JC Whitney). As such they came out at
approx. 15" on-center. The "studs" are 1x2 lumber. Above
the window is one of the two 12V fluorescent fixtures behind a plastic
diffuser panel. The roof is attached to the walls via screws installed
from below. It is strong enough that it easily holds my weight if I
climb on top.
Here
is a shot looking at the side window and wall-roof joint detail. I
built the two side walls and roof panels in separate pieces. The
vertical "studs" were spaced to fit the 15x30" sliding
side windows (ordered from JC Whitney). As such they came out at
approx. 15" on-center. The "studs" are 1x2 lumber. Above
the window is one of the two 12V fluorescent fixtures behind a plastic
diffuser panel. The roof is attached to the walls via screws installed
from below. It is strong enough that it easily holds my weight if I
climb on top.
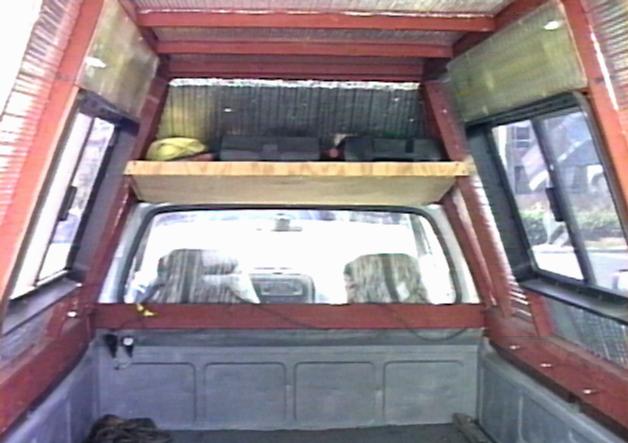 This
is a shot showing most of the inside. You can see the upper shelf I
recently added over the window. It is sloped forward and has a lip at
the back edge to keep its contents in place. I now keep my toolbox,
tire chains, and assorted odds and ends permanently stored there. You
can also see the aluminized insulation I've added to the wall and
ceiling. This is a thin plastic bubble type of insulation. I find it
does a fair job keeping things cool in back, cuts down on rain and wind
noise when sleeping in back, and the reflective aluminum helps the 12V
fluorescent lamps do their job better.
This
is a shot showing most of the inside. You can see the upper shelf I
recently added over the window. It is sloped forward and has a lip at
the back edge to keep its contents in place. I now keep my toolbox,
tire chains, and assorted odds and ends permanently stored there. You
can also see the aluminized insulation I've added to the wall and
ceiling. This is a thin plastic bubble type of insulation. I find it
does a fair job keeping things cool in back, cuts down on rain and wind
noise when sleeping in back, and the reflective aluminum helps the 12V
fluorescent lamps do their job better.
 This
is a closeup of the front air deflector I added. When I first completed
the shell, it was flush around the corners and I found my top speed was
lowered and my mileage dropped to around 35 on the highway. After a few
experiments, I determined this was mainly due to having the air
swirling off the top and sides of the shell rather than staying
attached. So, I added the fairings up and along the edges and added
deflectors front and rear. I made the defectors out of left over
plywood (used in the shell) cut into 2" wide strips, then attached
to angled sections of the fairing. In front, I used two strips and in
back four. I laid a sheet of fabric over the wood and covered it with
several coats of polyester resin for added strength.
This
is a closeup of the front air deflector I added. When I first completed
the shell, it was flush around the corners and I found my top speed was
lowered and my mileage dropped to around 35 on the highway. After a few
experiments, I determined this was mainly due to having the air
swirling off the top and sides of the shell rather than staying
attached. So, I added the fairings up and along the edges and added
deflectors front and rear. I made the defectors out of left over
plywood (used in the shell) cut into 2" wide strips, then attached
to angled sections of the fairing. In front, I used two strips and in
back four. I laid a sheet of fabric over the wood and covered it with
several coats of polyester resin for added strength.
Part List and Cost:
I didn't keep detailed cost records, but as I recall, the major expense were:
- 2 - 15"x30" sliding windows, at about $90 each, from JC Whitney
- 2 - 15W/12V fluorescent lamps, from JC Whitney
- About $100 in lumber, including 2 sheets of 1/4" mahogany plywood, 1x2 and 2x4 clear fir
- Roofing material including 1 gal. Elasto-Seal, 1 gal. Mobile-Coat and 1 roll of polyester fabric from Snow Roof Systems.
- A brass piano hinge and latching hardware for the rear door.
I plan on re-doing the rear door/window in full-width Plexiglass and changing the garage door latching hardware over to a locking T-handle latch from McMaster-Carr. That will add about $100 when I get done.
![]()
 ===>>
===>> 
[Last updated: 26.March.2021]