Quick Disconnect Mud Flaps
Introduction:
Mud flaps, your best friend and worst enemy. On the road, they are legally required, at least here in the Republik of Kalifornia (excerpt from the DMV Vehicle Code):
Fenders and Mudguards
27600. No person shall operate any motor vehicle having three or more wheels, any trailer, or semitrailer unless equipped with fenders, covers, or devices, including flaps or splash aprons, or unless the body of the vehicle or attachments thereto afford adequate protection to effectively minimize the spray or splash of water or mud to the rear of the vehicle and all such equipment or such body or attachments thereto shall be at least as wide as the tire tread. This section does not apply to those vehicles exempt from registration, trailers and semitrailers having an unladen weight of under 1,500 pounds, or any vehicles manufactured and first registered prior to January 1, 1971, having an unladen weight of under 1,500 pounds.
As I understand it, the tire tread is required to be covered at least to its midpoint in back. With any sort of lift, this usually means mud flaps, which have a nasty habit of getting torn off in snow, mud and rocks.
On my Toyota 4Runner, the factory mud flaps are attached with 3-10mm bolts in the rear (don't know what the fronts use - mine are long gone!). While not unreasonable to remove and replace them , it is tedious, the threaded holes get clogged w/ mud, and generally I only remove them on multi-day trips. Another solution I've heard of is to attach hooks to the flaps and then tie them up to the body when the need arises. I thought about this solution but couldn't find a clean way to implement it. Besides, with my new 33x15.50 Super Swampers, the old flaps were set in too far to cover the tread as required.
So, I set out to design a way to relocate the existing mud flaps and also make them easier to remove and replace. I had heard about another technique using two pieces of tubing, one attached to the vehicle with a slot in the bottom, and another that fits inside the first, attached to the mud flap. Then, you slide the small tube into the big tube, insert a pin to hold it and the mud flap is attached. While researching this concept, I found some aluminum channel that offered a solution that was much easier to fabricate and install.
Rear Installation:
 First,
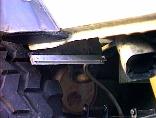
trim the fender about 3/4" below the body. Then, cut a length of
3/4" channel to fit across the trimmed fender piece. Then, drill a
half dozen 1/8" holes through the fender and channel and
pop-riveted the pieces together, easier if removed from the vehicle.
 Next,
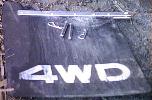
cut two pieces of the 1/8" flat stock to about the width of the
mud flap. Then, position and trim the mud flap to cover the tire tread
and mark where the mounting bracket should be. Then, the two pieces of
aluminum are pop-riveted to each side of the flap with 1/2"
rivets. Also pictured are the clevis and hitch pins.
 Finally,
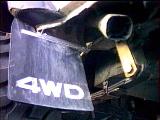
insert the flap into the bracket and drill 2-5/16" holes, one at
each end of the bracket, through the channel and flap to accept the
clevis pins. To install the mud flap, slide it into the bracket, insert
the pins from the tire side and secure with the hitch pins. It now
takes less than 15 seconds to remove or install each mud flap, with no
tools required.
Front Installation:
Still working on this design, stay tuned for updates.
Cost:
   $ 8 4' @ 3/4" x 1/8" thick aluminum channel
     8 8' @ 1"   x 1/8" thick aluminum flat stock
    10 8  @ 5/16" x 2" clevis pins
     4 8  hitch pins
     4 Assorted 1/8" and 1/2" pop rivets
   ------------------------------
  $34 for four mud flaps
Project Rating:
Only simple tools are required:
- Metal shear
- Hack saw
- Drill and bits (1/8" and 5/16")
- Pop-rivet tool
![]()
Visitor # 51850 since 28.AUG.2001
[Last updated: 22.March.2021]
![]()

