![]()
4Crawler Rock SliderZ
![]()
Contents:
[Return to 4Crawler Offroad main page... ]
![]()
Description:
Note: We've made many of our Rock SliderZ plans available, see link above
A popular add-on for 4x4s are nerf bars, that extend out from below the rocker panels. Sometimes called step bars, they are more for looks and convenience and I've seen on more that one occasion where the nerf bar bending under load can cause more body damage than the vehicle would of without the bar. For heavy duty use off-road, you really need something that will both protect your vehicle's body from damage and also keep you from getting hung up on an obstacle. Many people build their own bars and some companies are now offering heavy duty nerf bars or rock sliders. Most of these designs make use of welding the bar to the frame and rely solely on the strength of that weld and the support brackets to hold up the weight of the vehicle.
I used to run a rock slider from a now defunct company. These bars worked great and featured a bolt-on design that was more than strong enough for even hard core rock crawling. When I made some changes to my vehicle, I found it was necessary to either modify or replace the rock sliders. I chose to design my own version, correcting a few deficiencies in the original design and make it fit my modified vehicle better. So. I designed and built the 4Crawler Offroad Rock SliderZ for functionality:
-
A bar that was bolted on
- I prefer not to weld on the frame any more than I have to :-)
- If damaged, a bolted on bar is easier to replace
- If the vehicle is later body-lifted, a bolted on bar is easier to lift or remove and replace
-
Make them strong enough to support the weight of the truck
- Both for vehicle recovery, sometimes it is necessary to use a HiLift jack off the bar to raise the truck
- When "surfing" over large rocks, you may have most of the vehicle's weight riding on the bar
-
A flat top to be able to stand on
- Important for trail hands to help counter-balance the vehicle in a tight spot
- And it makes getting in and out of a lifted truck oh-so-much easier
-
I wanted the bars to work with various amounts of body lift
- The design can accommodate mild (0-1") and tall (2-3") body lifts
-
A bar that would both protect the body and be a useful tool for
off-road use
- A bar that lets you slide up and over a rock rather than high-centering on it is very handy
- Often, the bars can be a useful point to jack up the vehicle from when stuck
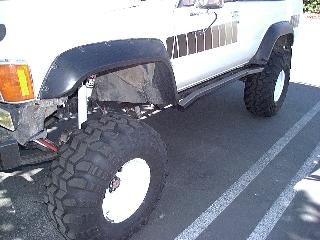
Here's what 4Crawler Offroad came up with. If you run run wider than stock tires and wheels, you can add 1" or 2" kicked out sections to the front and/or rear of the slider to help slide off and away from rocks so the tires can grab them. This allows the center section of the bar to be just a bit wider than the body for protection, but no wider than absolutely needed. These are not some wimpy nerf bar, the 4Runner bars weigh in at about 35-50 lbs. each, other models more or less depending on length.
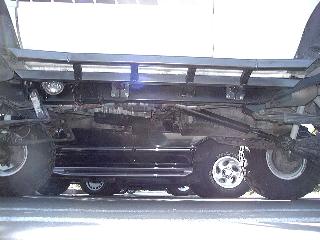
Here's a shot underneath, showing the outrigger braces from the outer to inner bar. The inner bar runs the full length from wheel well to wheel well providing full protection for the underside of the body. As a side benefit, it also hides the frame on body-lifted trucks. From the inner bar to the frame, you can see the two main supports. They bolt to the frame and provide more than enough strength to support the weight of the truck. The inner bar has another function, too. Under extreme loading, the bars will flex upwards until the inner bar contacts the body pinch weld, at which point the load is transferred to this very strong parts of the body. By spreading the load over the entire length of the pinch weld, there is little chance of damage occurring.
The underside of the bar is smooth from front to back, nothing sticks down any lower than the frame, the outer bar is cantilevered up at an angle for an additional 2" of ground clearance. The ends are tapered to slide on and off of rocks easier. All the ends are capped with heavy steel and all joints are fully welded to prevent internal corrosion. The bars themselves are available unpainted or in a paint finish that is easily touched up in the field.
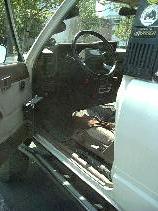
Besides providing protection for the sheet metal on your truck, the bars also are functional as steps for ease of entering and exiting the vehicle, as well as for accessing items stored in on on top of the vehicle. The flat top of the square tubing provides secure footing and on painted bars, a 3M grip tape is installed for extra traction especially in wet conditions. I prefer the rubber tape to the more common grit tape since the rubber tape is much less abrasive, which you'll appreciate if you ever rub a bare leg across it!
I've been asked whether the ladder like outrigger bars get hung up on rocks on the trail. To date, I've never had any trouble with this. I've run my bars over some of the toughest trails in California, Oregon and Utah including the Rubicon, Fordyce Creek (Sierra Trek), the McGrew Trail, several trips through the Hammers in Johnson Valley, Dusy-Ershim, Moab Utah - including Pritchett Canyon, Rusty Nail and other trails, and have only once even seen a scratch on the ladder bars from a rock. My old American Metal bars had a similar ladder design and I ran those 3+ years without a problem.
Why did 4Crawler Offroad use a bolt-on design? There are a number of benefits:
- A bolt-on bar offers ease of installation, no welding required
- A bolt-on bar can be welded on if desired, it is not necessarily true that a weld-on bar can be bolted on
- A bolt-on bar can be fully pre-finished, unlike a weld-on bar
- Some vehicles come with factory mounting holes for step bars, so these are used where possible
Why does 4Crawler Offroad use a self-tapping bolt vs. a clamp-on mount?
- While clamp-on may seem like a slick way to go, it complicates the design.
-
The clamp must be a tight fit to the frame.
- There is often a significant variation in frame widths due to mfg. tolerances, that would require custom fitting the clamps to the frame.
-
You also need room on all four sides of the frame to install the clamp.
- Any gas or brake lines, e-brake cables, brackets, etc. on the inside of the frame may need to be relocated.
- By mounting to the outside of the frame, its possible to place the mounting brackets where they work best for supporting the bar, rather than placing them where there is room for them.
- The bars can be mounted with either self-tapping bolts only or with a combination of self-tapping, thru-bolts, or sleeved-bolts for the bottom holes.
- And of course the bars can also be welded in place if you prefer.
So, is a bolted-on slider able to stand up to use and abuse on the trail? Have a look at the pictures below and see for yourself:
[back to the top]
![]()
Specifications:
Fully bolt-on installation, dual tube 4Crawler Offroad Rock SliderZ are built of 2" x 2" and 1.5" x 1.5" steel tubing.
- Standard bars are built of all 1/8" wall tubing throughout
- Ultimate bars feature 3/16" wall tubing on the outer bar for added durability in hard core rock crawling.
- Both long bars are beveled to 45° and capped with like thickness flat bar
-
Either bar is strong enough to protect the body and will support the
vehicle's weight.
- The thicker walled Ultimate bar has a bit larger radius corners to hold up to the rocks better and the thicker metal should withstand rocks scraping over it for many years
- All tubes fully MIG welded with 70,000 psi filler wire and Argon/CO2 shielding gas
- While the bars are bolt-on (drilling required for some applications) they may also be welded to the frame if desired
Optional kick-outs are available front and rear. With standard width wheels and tires, no kick-out if really needed (see image above), but if you are running wider than stock tires and wheels, then a 1" or 2" kick-out will help fill the transition from bar to tire. The inner tube of the bar serves an important function. These bars are designed to have a bit of flex. Under load, the bars will bend upward a bit, until the inner tube makes contact along the full length of the lower body-floor seam. By spreading the vehicle weight over the length of the bar, the load is transferred to one of the strongest parts of the body. Other nerf bar designs rely on absolutely rigid mounts such that the bar alone is supposed to be able to support the full vehicle weight. This often requires the bars be welded to the frame with heavy bracing and if not done properly, the nerf bars themselves can flex upwards and damage the body.
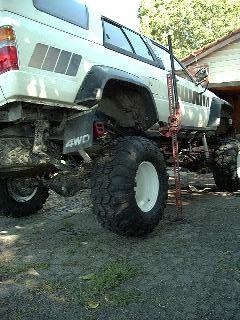
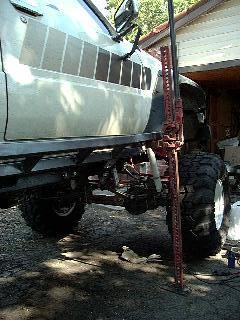
The acid test for these bars was to lift the side of the vehicle off the ground off the very end of the bar. Here, you can see the back tire lifted clear off the ground using a jack on the rear end of the bar. Similar results were obtained in the front end lift. You can see how the inner tube has made contact with the body seam in the right hand picture. This is by design and under extreme loads, they are designed to flex and transfer the load to the strong body seam. Also, note the big advantage of a square tube slider over a round tube design, no special adapter is needed for the jack.
- Note:
-
The bars project a bit wider that the widest part of the body to keep
the HiLift jack handle off the sheet metal.
- While the pictures show HiLifting off the very ends of the bars, it is best to keep the jack inside one of the outrigger bars to keep it from sliding off the end of the bar if the vehicle or jack shifts while lifting.
So lifting the truck off the ground with the bar is interesting, but how do these things work on the trail?
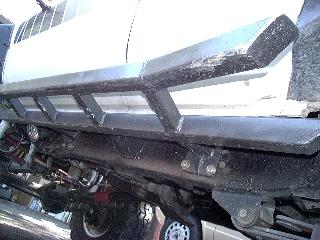
Here's a closeup shot of the bars after their first trip off-road. A run to the local OHV park wasn't a valid test, rather, I took them over the infamous Fordyce Creek trail in the Sierra Nevada of northern California. Fordyce Creek is the trail used by the Sierra Trek for their short wheel base run. With my 106" wheel base, I figured I was near the 110" limit they impose on that run, so what better test. You can see in the above shot that the bars definitely saw some action. I had a couple of occasions to use the rear kick-outs, one time they probably kept me from rolling over. On another rock, I surfed the full length of the rock on the inner bar, wonderful sound of steel on granite the whole way over. Due to the smooth design, I slid over with ease and was even able to back up, turn and take a slightly different line, all the while with the driver's side of the truck fully supported on the bar. You can see the paint scratches all along the inner bar and the underside of the outrigger supports. Needless to say, I was totally pleased with the way these bars worked and would not change any part of the design for my rig.
However, for the less hardcore user, I have a less radical bar design. It uses 1/8" wall tubing throughout, reducing the weight and cost, while still offering adequate body protection.
- My original nerf bars were this thickness tubing and survived several years of abuse with only scratches.
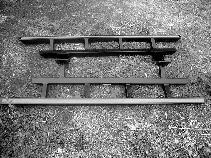
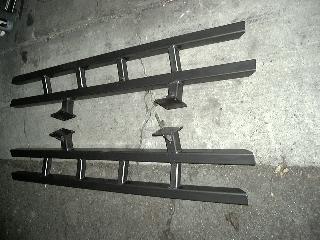
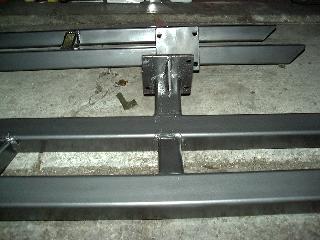
For vehicles with stock width axles and running narrower tires, I also can make the bars without the kick outs (pictured above), which could potentially extend beyond the narrow tires and actually cause you to get hung up on the bar itself. In the above-left image, are a pair of standard duty Rock SliderZ and in the above-right image is a closeup of the mounting bracket for the 0"-1" body lift version. In this case, the outrigger legs are placed at the bottom of the frame and the bracket extends upward. In the 2"-3" version, the outrigger sits near the top of the frame and the bracket extends downward.
[back to the top]
![]()
Pricing and Options:
Note: Due to the large order backlog currently in place and problems with shipping assembled sliders, new orders will only be accepted for Rock SliderZ kits until further notice.
4Crawler Offroad has come up with a basic rock slider design that can be modified to suit the exact needs of the owner and vehicle. As such, the bars can't be mass produced, rather they are built to order.
- Many vehicle applications are currently available:
-
-
Toyota:
-
4Runner
- '84 -'89 = 1st generation - available
- '90 -'95 = 2nd generation - available
- '96 -'02 = 3rd generation - available
- '03 -'04 = 4th generation (non-XREAS) design available
-
Short Bed pickup
- '79 -'95: available
- Xtra Cab pickup
-
Tacoma
- Std. Cab Short Bed:
- Xtra Cab:
-
Quad Cab:
- Possible - need dimensions
-
Tundra
- Possible - need dimensions
-
4Runner
-
Nissan:
-
Xterra
- 2000-2004 (Gen 1) model years available
- 2005-2006 (Gen 2) model years now available
-
Pathfinder
- : 1986.5-2004 - available
- Models for Gen1(1986.5-1995) and and Gen2(1996-2004) available
-
Frontier
- Available, email for details
-
Xterra
-
Mitsubishi:
-
Montero
- Gen2 - LWB/4dr available
- Gen1 - LWB/4dr. and SWB/2dr. available
-
Montero
-
Toyota:
- There are two basic models:
-
Standard, uses 0.120" wall steel tubing
throughout
- Still strong enough to lift the vehicle with, but might dent a bit if you land hard on a sharp rock
-
Ultimate, uses 0.188" wall tubing for the outer
tube for serious rock crawling
- Thicker wall tubing has a larger outside radius which lets the bar slide over rocks easier and the thicker walls resist denting
-
Most versions can be built with the outside bar straight or with
1" or 2" kick outs over the last 12" at the rear and/or
front as desired
- For stock axles, wheels to 8" wide or tires to 12.50" wide, no kick outs are required
- For wider axles, wheels and/or tires, a rear kick out is recommended, front is optional
-
For folks concerned with getting hung up on the outrigger supports, I
offer to insert expanded metal sections in between the ladder rungs for
an additional $100/pair of bars.
- This would include the enclosed sections, the front and rear would remain open
- So far this has not been an issue with this design and nobody has selected this option
- On some models, the mounting setup can be built to accommodate various amounts of body lift
- The bars can be shipped in kit form or assembled in unpainted, primed or primed/painted finishes
![]()
Toyota 4Runner ('84-'04):
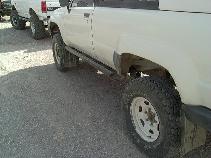 |
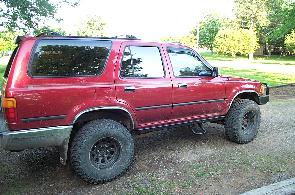 |
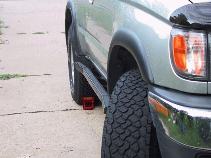 |
Your Picture Here |
| 1st Generation | 2nd Generation | 3rd Generation Front+rear 1" kick outs pictured |
4th Generation |
- Note, Jim Devereux customized his 2nd gen sliders (above center) with removable hoop steps to allow for easier access to the truck for his significant other, nice job!
Toyota short bed pickup ('79-'95):
[back to the top]Toyota early Xtra Cab Toyota pickups (112" wheelbase - '84 - '88):
[back to the top]Toyota Xtra Cab Pickups (122" wheelbase - '89 and later):
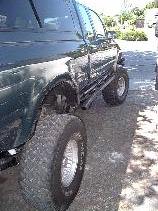 |
| '89-'95 Xtra Cab (33x12.50 tires) bars 1" rear kick out, Ultimate bars pictured |
Toyota Tacoma Std. Cab/Short Bed (1995.5 - 2004 models):
Toyota Tacoma Xtra Cab (122" wheelbase, 1995.5 - 2004 models):
Nissan Xterra:
 |
 |
 |
 |
 |
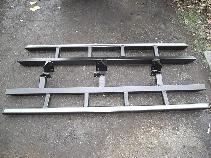
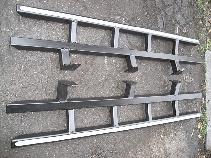
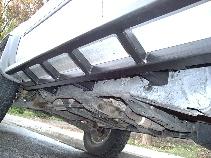
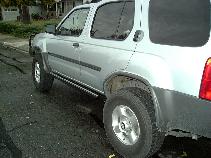
Typical 2000-2004 Sliders Gen1, Std. width pictured |
 |
 |
 |
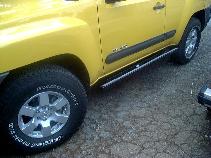 |
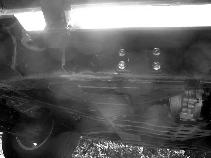 |
Typical 2005-2006 Sliders, Gen2, Extra wide pictured |
[back to the top]
Nissan Pathfinder:
 |
 |
 |
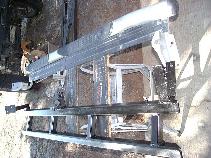
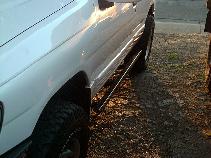
| Rock SliderZ vs. step bars | Side view from the rear | Sideward projection |
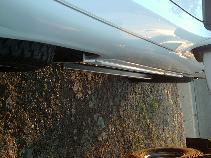
The Pathfinder Rock SliderZ utilize all 6 factory step bar mounting holes, similar to the Xterra. Utilizing custom fabricated brackets to match the bends and angles of the factory step bars ensures a secure fit. Since there is no body/frame flex on the uni-body Pathfinder, the bars are set within 1/4" of the pinch weld seam to maximize ground clearance. Inner bar is 62" long. Check out Dean's Xplorx4 web page for more photos The sliders use the same standard and extra wide outer tube options, as offered on the Xterrra models, in order to be the same width as the factory steps for double use as a step and slider (extra wide) or a little narrower (standard width, extra cost), perhaps to add kick outs to.
Versions for the older hard body Pathfinders are also available, they use self-tapping bolts for mounting.
[back to the top]Mitsubishi Montero:
For the Gen-I and Gen-II short and long wheel base Montero vehicles, currently. For other models, inquire. Pictured below are two variations of the Gen-I and Gen-II sliders, the Gen-I are shown in a straight configuration, while the Gen-II are shown with optional kick outs for use with wider tires and/or factory fender flares. Either style slider is available in straight or kick out versions, your choice. When straight sliders are ordered, the 4 outrigger supports are run out to the ends of the sliders, while the kick out version has them in about 12" from either end. Only difference between the Gen-I and Gen-II sliders are the location of the mounting brackets on the frame, otherwise width (about 1/2" wider than the widest extent of the door panel) and wheel-well to wheel-well length (~68") is the same. On the Gen-I/SWB sliders, the wheel-well to wheel-well length is ~53". Front mount is the same as on the LWB sliders, rear mount is moved forward to match the SWB frame.
The standard mounting bolt kit will include 2 self-tapping and 2 through-bolts (un-sleeved) per bracket. The sleeved bolt kit will include 2 self-tapping bolts and 2 sleeved through bolts per bracket. The bars may also be welded to the frame, either stand-alone or after bolting to the frame for additional strength. A 1" weld bead along the bottom of each support bracket is sufficient.
[back to the top]
![]()
Painting and Options:
-
Primed includes prep (clean
and acid etch) and base coat with black POR-15 primer
- If you want a custom color top coat, you can order just the POR-15 primer coat, then sand and apply your own top-coat
- POR-15 should not be left exposed, it is sensitive to UV radiation and will degrade in sunlight
-
Painted includes two top coats of POR-15 Chassis Coat-Black
- Chassis Coat is a semi-gloss coating that is UV resistant
-
While it can be painted over bare steel, the durability is not as good
as when applied on top of POR-15.
- That is, you must also order the bars "primed" as well.
- POR-15 is a heavy duty industrial quality paint. It is very thick and durable and as such, its final finished appearance will reflect that. That is it will not be a show car finish, if that is important to you, consider getting the bars primed or bare steel and finish them yourself. Considering that the bars will be scraped over rocks and be peppered with gravel from the tires, durability and maintainability of the finish is more important to the bars than what they look like.
-
Grip Tape is now available in two
options, 1" wide 3M Grip Tape installed on the outer bar:
- A Gray rubberized medium duty grip tape (click for image)
-
A black grit-type heavy duty grip tape (click for image)
- I've used both and prefer the Gray rubber tape. It has decent grip and won't take the skin off your legs if you slide over it.
- The Gray tape can also be dyed with Kiwi Leather Dye if you prefer a darker color.
- You can order the grip tape separately if you plan to paint the bars yourself.
-
Powder Coating
- If you want to powder coat the bars, order them unpainted then have then sandblasted and coated after receiving them
-
Air Storage Option
-
Any of the Rock SliderZ may be sealed and fitted for air storage.
-
Two options available
- Cost for the air storage option is $50.00 for the inner tubes, $80 for the inner and outer tubes
- The lower cost is to seal just the inner bars and provide 1/2 the air storage capacity
- The higher cost option is to seal both inner and outer tubes and one outrigger tube to connect them together
- Inner and optionally outer tubes are double sealed
- A 1/4" NPT pipe thread nipple is installed on each bar for connecting to the air supply
- Net air capacity is approx 1 gallon per 20" of slider length on double tubes or 1/2 gallon per 20" on single tubes
- Pressure tested to ~110 psi for visible leaks detectable with soap bubbles
-
Two options available
-
It is recommended that the sliders not be run pressurized while on- or
off-road for safety reasons.
- Install a shut-off valve if you need to have pressurized air for air lockers or the like.
- When air volume is needed for airing up tires, open the valve to charge the sliders, and use like a normal air tank.
-
Any of the Rock SliderZ may be sealed and fitted for air storage.
![]()
Kick outs or not?
Kick outs refer to the last foot (12") of the outer tube of the sliders when it is angled outward, typically 1" or 2" from the rest of the tube. They are a useful addition to the sliders for off-road use. What they do is help to push the truck away from an obstacle to make it easier for the tire to grab it. They also help to protect the fenders, which can get damaged from sliding into a rock when you hit the end of a shorter set of sliders. Since many rock sliders have outer tubes that "dive" back towards the frame at the end, this can cause the truck to slide into a rock that you are maneuvering around. I had exactly this problem with my old round tube sliders, discussed below. One advantage of the kick out is that is keeps the sliders as narrow as possible (yet still protecting the body sheet metal) yet make the sliders a bit wider at the ends to help protect fenders and work with wider tires.
So how big to make the kick outs? The basic sliders are designed such that the outer edge of the outer tube is just wider than the widest part of the side of the body of the vehicle. So if you were to press your cheek to the side of the door panel and close the outside eye and peer down with the inside eye, you would just see the outer edge of the slider beyond the body sheet metal. Or if you were to hang a weighted string down vertically, the string would touch the slider perhaps 1/2" before contacting the body. Now, if you have wider than stock wheels/tires that project a significant distance wider than the body, measure how far the tire stick out. Then divide that distance in half for the ideal kick out width. So for a tire that stick out 2" wider than the body, a 1" kick out works well, for 4" wider tires, a 2" kick out can be used. Note that you want the distance the tires are wider than the door panel, not how far they are outside the fenders, most of the time.
One other use of kick outs is to clear fender flares, in which case you would want the kick out to be wide enough to clear the fender flare or to flow into it. This way the flare is offered some protection from off-road obstacles as you slide along them.
kick outs are not required, the sliders work just fine without them, so if you don't want kick outs on your sliders, by all means order them made without kick outs. When built without kick outs, the outrigger support tubes are spread out such that they run almost to the front and back of the outer tube, rather than ending a foot from either end.
[back to the top]
![]()
Mounting:
On vehicles that lack sufficient factory mounting holes, some method of attaching the Rock SliderZ to the vehicle frame is required. I offer three mounting options:
- Welding
- Self-tapping bolts
- A combination of self-tapping and sleeved bolts
Welding is probably the fastest (and easiest - if you have access to a welder) means to attach the bars to the frame.
Self-tapping bolts are the next in order of ease of installation. They require marking and pre-drilling holes in the frame for the bolts, which form threads as they are screwed into the frame steel. You may need to use an angle drill or attachment and a short drill bit to allow drilling holes in confined spaces. Overall length is ~4.5" and is small enough to fit in even the tightest body-frame clearance. Use a 5/16" center bit for easy starting of the holes after marking with a center punch, then it enlarges the hole to the proper size for the self-tapping bolt, all in one step, no need to use a small bit to start, then a larger bit to finish the hole.
Kits:
If you are able to do some basic welding or have a buddy who can weld, the a cutting list for the bars are available. The tubes have simple end cuts and square tubing is readily available at local steel suppliers. Most will even custom cut tubing to your specifications for a nominal charge. Metal Supermarkets is a good source of steel.
[back to the top]
Ordering:
Note: We're only offering free Rock SliderZ plans. at this time
[back to the top]
![]()
Standard vs. Ultimate:
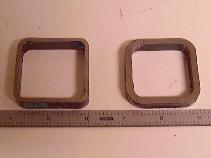
What's the difference? I use 1/8" (0.120) wall hot rolled electrically welded (HREW) tubing throughout for the Standard bars, while the Ultimate bars use 3/16" (0.188) wall tubing for the outer bar. You can see the two options in cross section below:
The Standard tubing is plenty strong for most applications, its lighter in weight (saves on shipping cost). The Ultimate tubing has a thicker wall to stand up to continuous scraping over rocks, and since the wall thickness is greater, the radius of the corners are larger as well. In fact, you can see the corner radius is about 0.5", or the same as a 1" dia. round tube. This helps the tubing slide over rocks easier. Since it is the outside lower edge of the outer bar that sees most of this abuse, this is where the "beef" needs to be. An advantage over a round bar is that there is still a 1" wide flat spot on the top of the bar to allow application of grip tape for better traction when standing on the bar and no special adapters are needed to use a HiLift type jack on a square tube slider.
So why not use the heavier tubing for the rest of the bar in the Ultimate version? I don't feel the added weight and cost are justified in the other parts of the slider. For example the inner tube will only see contact along its base, so the rounder corner is not an advantage. In fact the rounder corner makes for a poor fit-up on the welded joints. Making the bars entirely out of the heavier wall tubing would increase their weight and cost by 50% and provide little added benefit. This is also the reason I don't go up to a 1/4" wall tubing, its just so much more added weight.
Which would I recommend? It all depends on how you plan use the sliders. If you wheel on mild and moderate trails and only need the sliders for occasional protection from trail obstacles, then the standard bar is fine. It'll protect the vehicle, provide a handy place to use a HiLift jack from, etc. If, you plan to run trails like the Rubicon, the Hammers or similar trails several times (or more) per year, then the thicker steel of the Ultimate bar is for you. These trails require the use of rock sliders for getting over the trail. They aren't merely for protection but become a tool to get across or around obstacles.
And why square tube and not round, isn't round tube stronger? Yes, round tube is about 18% stronger pound for pound than square tube. If weight and strength were the only considerations, round would be a good choice. Square tubing makes a more practical slider, works as a more secure step and makes a more secure HiLift jacking point without the need for a spacial adapter for the jack. Since the Rock SliderZ are designed to be multi-functional devices, square is much more useful. However, if interested, a round tube outer bar is an option for custom orders.
[back to the top]
![]()
Background:
After I first started wheeling my 4Runner, I decided I wanted some rocker panel protection before I got into big rocks. I researched the options and found the American Metal Rock Sliderz nerf bars that seemed to fit the bill. They were strictly a nerf bar, not even close to being a step. They were bolt-on, low profile and were not meant to be totally rigid. In fact they were designed to bend and flex a bit, transferring the weight of the vehicle to a 4-5' length of the body seam. Unlike single tube bars that can cause as much damage to the body when they flex, the Rock Sliderz were designed to distribute the load over a large area to prevent localized damage. In 2 years of hard 4-wheeling, I never had a scrape or dent to the rocker panel area, nor did the bars dent, bend or suffer any damage aside from some scratched paint.
So, why did I replace them if they were so good? A number of reasons:
- First they were only suitable for 0-1" of body lift. Any more lift and you could not get the inner bar close enough to the body to function properly. I was planning a 3" body lift and wanted to gain the full 3" of additional side clearance.
- The old bars dove back into the frame at the ends, which would end up sucking the vehicle towards a rock that you were trying to climb. I wanted to have a "kick-out" at the ends of the bar to push the vehicle away from the rock to allow the tire to climb better.
- Because of the design of the body and the outer bar returning to the inner bar, installation required that a half-moon of sheet metal be removed from the body seam for proper fit. Out in the drier west coast, rust is not an issue, but if this was done in the rust-belt, it is in a very bad place, right in front of the rear wheel.
- The old bars were a bit too narrow, there were times I had wished they were a few inches wider, they were actually an inch or two narrower than the widest part of the body.
- Finally, while I wasn't looking for a step bar, the old bars, being so close to the body and round, were almost impossible to step on, and if your feet were wet, they were downright dangerous. So, adding that all up, I decided I would be better off selling the bars and designing my own.
- Also, with the round tubes, a special adapter is needed for the use with a HiLift type jack.
![]()
Visitor # 202984 since 13.AUG.2001
[Last updated: 14.July.2024]
![]()


 ===>>
===>> 