1985 4Runner Bumper Upgrade
![]()
This page began as a place to document the installation of new front and rear bumpers on my 1985 Toyota 4Runner. However, as that project took shape, a number of related projects cropped up and since they are somehow tied in with the bumper project, I thought it best to document them here as well:
- Introduction
- Bumper Installation
- CB Antenna mount
- Winch
- Auxiliary gas tank
- Rocker Panel Protection
-
Summary
- Back to my 4Runner Cheap Tricks page.
![]()
Introduction:
When I purchased my '85 4Runner, it already was equipped with aftermarket bumpers. It had a SmittyBilt (SB) dual tube front bumper (black powder coat) and a Hobrecht dual tube rear bumper (chrome). The front bumper was in good condition, although there were a few places with signs of rust, that I sanded out, primed and re-painted. The rear bumper was also in fairly good shape. So why did I decide to replace them?
The front bumper had no provision to mount a winch. I toyed with the idea of cutting the top tube and fitting a winch mounting plate like the SB winch bumper. One design quirk I noticed with the SB front bumper was that it mounted both the the frame and the body. I don't know what adverse impacts this has, but the front body mounts are basically rendered immobile. The rear bumper was mounted too low and stuck out too far for my taste. It also aside from a Class A ball hitch, it had no provision for recovery hooks, or a tire carrier. My motivation for a wanting a tire carrier was to allow me to carry a full-sized spare (a 33x9.50 just *barely* fits underneath the bed) and to re-use the spare tire space underneath for an auxiliary gas tank.
So I began the search for new bumpers. I ended up choosing Kennesaw Mountain Accessories Wincher front bumper. They have a decent front and rear bumper combination and the prices were quite reasonable, even with cross-country shipping and custom modifications. Other rear bumpers I looked at cost from $700-1000. Here's what I ordered:
Item: Multi-carrier for
1985 Toyota 4Runner with 33 x 9.5 6-bolt hub
- Tire carrier to pivot from driver's side.

Price: . . . . . . . . . . . $335.00
Options:
 1) receiver hitch             65.00
    - recessed into bumper
 2) hi-lift jack carrier       25.00
 3) Wrap-around tapered corner 25.00
Sub Total:                    450.00

Freight: . . . . . . . . .     55.00
------------------------------------
Total: . . . . . . . . . . . $505.00

Item: Wincher for 1985 4Runner.
- Drilled for Warn 8000 winch
Price: . . . . . . . . . . . $225.00
Freight: . . . . . . . . .     35.00
------------------------------------
Total: . . . . . . . . . . . $260.00
[Back to the top]
![]()
Here's how I installed the bumpers:
Front Wincher Bumper:
I chose the KMA Wincher bumper for a number of reasons. It is very rugged and simple. I've seen brush guard style bumpers get bent and the brush guard that was supposed to protect the truck ends up smashing into the hood. It is priced very reasonably and was designed for easy winch mouting (no mounting plates or adapters needed). It also is compatible with use of a HiLift jack.
After ordering the bumpers at the end of August, 1997, I waited about 6 weeks for the front bumper (113 lbs.) to get built and another 2 weeks for the rear (139 lbs.). This was smack dab in the middle of the UPS strike, so that was mainly responsible for the delay. One thing that was not clear when I ordered the bumpers was that they didn't come with mounting hardware. I assumed it was included so I didn't ask when I placed the order. Kyle at KMA offered to make mounting brackets to my specifications, but after numerous back and forth communications, I decided to do it myself.
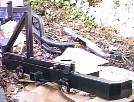
For the front, I removed the tow hooks (the stock one and a second I added earlier) and fashioned two pieces of 3/8" x 2" flat bar, approx 16" long to fit in their place. I was able to use the two tow hook bolt holes as well as another one 8" farther back on the frame by drilling and tapping them for 1/2"x20 bolts (I couldn't find suitable metric hardware to fit the stock holes). The bar projects 6" in front of the frame (looks like a forklift) and provides an easy platform to position the bumper. Then I drilled two holes up through the bar and winch platform spaced to accept the tow hooks. Then, I fashioned a piece of 2" angle to fit over the front of the frame and project over the winch plate. The rear bolts pass through this angle and it in turn is bolted to the frame via the old bumper mounting holes. With a 1" body lift, I still had some interference between the lower edge of the body and the bumper's channel member. I simply cut out a notch in the sheet metal to allow the channel to pass through.
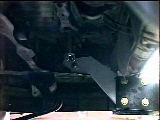
Here's a view from underneath showing the reattached tow hooks. I used 2 1/2" Grade 5 bolts passing through the angle, winch mounting plate, 3/8" bar and the tow hook all torqued down to 100 ft-lbs. This provides adequate support for the bumper in the vertical direction, but when I add the winch, there will be enormous horizontal forces pulling on it. To counter these forces, I ran two 3/4" bolts through the body mount horns into the rear of the bumper (you can see the 3/4" bolts in the first image). I used short pieces of 3/4" pipe to serve as bushing inside the body mount and heavy washers to fill in the ~5/16" space between the body mount and frame and to transfer the load to the mount. The back side of the bumper has a piece of 3/8" plate welded between the winch box and support channel. The bolts pass through this plate and are tightened from the bottom. All in all, the mounting hardware cost approx. $50 and took about 2 days of fiddling around to install. Drilling 3/4" holes in steel plate is *lots'a fun* with a 1/2" hand drill.
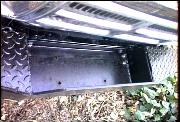
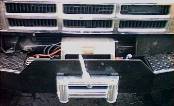
The bumper has a very large box for mounting the winch. It is about 24" wide and 8" deep, surrounded by 3/8" steel plate.
The Wincher bumper sits a bit lower than my old SmittyBilt tube unit. Now, instead of needing a valence to cover up the frame, I now need something to fill in the gap between the top of the bumper and the bottom of the grill. I found that my Hella 550 fog lights fit really nicely between the headlights and the bumper. This puts them out wide and as low as safely possible. A section of wire loom runs under the grill between the two lights to protect the wires, which in turn run through a hole by the radiator and up to a relay by the air compressor. A separate, fused circuit powers the lamps and a lighted switch on the center console controls them, via the parking light circuit. I shot the white Hell stone guards with black undercoating to blend into the other black in front. The front license plate mounts between the fog light and radiator on the passenger side.
To test the bumper, I stuck a Hi-Lift jack out on the end of the bumper and lifted the front tire, no detectable deflection. Then I centered the jack in the middle of the winch box and lifted the entire front end of the truck. Once again no deflection at all. With the SB bumper, I was always careful to place the jack beneath the mounting bracket. Now, I can place the jack anywhere and not worry about damage.
Bumper/mounting cost:
  Wincher bumper (delivered)      $260
  Mounting hardware                 20
  Sale of old bumper               (85)
--------------------------------------
                                  $195
I set up the bumper up as an air tank, drilling and tapping holes for air fittings to give me 2 gallons of air storage.
I re-mounted the front bumper higher. I uses some attach a 2x2" steel tube across the front of the frame flush with the bottom of the frame. It'll attach to the frame using the 4 stock bumper mounting bolt holes in front, and I'll weld the current bumper brackets under it. he brackets will be bent upwards at an angle to meet a new piece of steel from the top of the 2x4 tube, forming a triangular support. The ends of the 2x4 will be capped with vertical stock extending up beside the heavy channel of the bumper. This lifts the bumper 2". This bar can also hold some new front spring hangers to allow a 2" longer spring to be used for greater articulation. Here's a photo showing the raised bumper and filler.
[Back to the top]Rear Multi-Carrier Bumper:
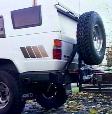
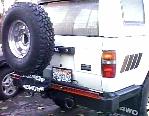
Here is a shot of the assembled Multi-Carrier. Note the driver's side tire carrier, the hitch receiver, the massive recovery shackles and the bump side extensions. You can also see one of the two 3/8" thick mounting tabs welded to the bumper. My old bumper used a piece of 5/16" steel to transition from the rear frame channel to the bumper. I found it to be a bit flimsy for my taste and it placed the bumper too low and far back.
So, in designing the mounting for the Multi-Carrier, I wanted to get it as high and close to the tailgate as possible to maximize my departure angle. In doing so, there are two main constraints:
- The vertical arm of the tire carrier frame meets the tailgate on the plastic piece that holds the license plate lights and the window switch, just to the left of the license plate light and the TOYOTA letters. This was the reason I chose the left-hand pivot, otherwise the frame would be dead center on the key switch, meaning the tire would need to be swung out just to operate the rear window. Due to the curvature of the tailgate, this sets the inside edge of the bumper about 2" behind its lower edge.
- In order to allow clearance for the bottom of the tail gate while opening the bumper is mounted about 1/4-1/2" below the bottom lip of the tailgate. This is the lowest point the tailgate reaches in its opening path.
With these two points determined, I designed the brackets to make the transition from the end of the frame to the tabs on the bumper. With 1" of body lift, the bottom of the frame rail is even with the bottom of the tailgate (and therefore the top of the bumper). The bracket then just needs to make the transition from the 3" high frame rail to the 4-1/2" high bumper tab. The distance between the frame rails is 41" and the distance between the mounting tabs is 38-3/4", leaving a total gap of 2-1/4", or 1-1/8" on each side. The distance from the frame end to the mounting tab is 4-1/2"
- The bumper itself tips the scale at 89 lbs. and the tire carrier adds another 50 lbs. to the total.
- The brackets weigh in at about 35 pounds with the mounting hardware.
- Add to that a 33x9.50 tire mounted on 15x6 steel rim and a 60" cast steel Hi-Lift jack.
- Click here to see a VRML model of the bracket.
Here you can see the three pieces of 3/8" hot-rolled steel sandwiched together to provide enough thickness to fill this gap and more than enough strength to support the bumper.
I received the finished bracket pieces on Sunday, Jan 11, 1998 and by that evening had them installed. The frame mounting holes lined up perfectly with the ones in the bracket. I had scribed the locations onto the prototype then had all 6 brackets pieces drilled simultaneously on a vertical milling machine. With 1-1/8" of steel in the 2" wide frame channel, getting to the forward bolt is tricky. I used an open end wrench and taped a nut into it and managed to get the bolt threads started before inserting the rear bolt. To install the bumper, I supported it on concrete blocks, shimming it to align with the brackets. I needed to remove some of the plastic bumperette to allow the bumper extension to recess properly (bumperettes have since been removed). I used a 1/2" chamfering bit in a small air drill to mark the mounting holes on the bumper's mounting tabs. Then, with the bumper pulled back, I drilled the holes out to 1/2". After priming the brackets, I reinstalled the bumper, inserted all the bolts and torqued them to 85 ft.lbs.
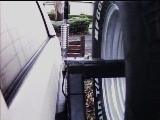
The spare tire carrier drops into its pivot hole (1" dia) and and a jam nut holds it in place. The tire mounts onto two 1/2" studs, the same with the Hi-Lift jack. I found I had to remove the base of the jack (mine is a 60" model) to allow the carrier to swing out fully. The carrier latch is very secure, it has a spring loaded pin and a locking notch. When engaged, it is very solid with no rattles. The tire is mounted very high, well above the departure angle of the bumper. In fact, with the 33" spare, the top of the tire is just below the roof of the vehicle.
That big rubber donut in back effectively obscures the license plate in the stock location. So I riveted two pieces of aluminum stock to the inside of the tire carrier arm to attach the license plate to. This also stops the latch pin from pivoting forward into the tailgate.
Bumper/mounting cost:
  Multi-carrier bumper (delivered) $505
  10'x6" 3/8" hot-rolled steel       40
  Labor to cut & drill stock        380 (that one-off stuff is expensive!)
  Grade-8 mounting hardware          20 (12 ea. 1/2"NF 2-1/2" plus washers and nuts)
  Sale of old bumper                (50)
----------------------------------------
                                   $895
So, it looks like my rear bumper ended up costing about $100 less than Scott Wilson's, in the end. I like the way the bumper protrudes beyond the body a bit. In a recent outing, I had the driver's side in a deep rut at about a 30 degree lean. After getting out of there, I observed the paint on the lower edge of the bumper side was scraped away, not a scratch on the body, though.
Caveats:
I've run into a few minor issues with the bumper, most of which are easily remedied:
- After deep water crossings, water can fill the bumper through the carrier latch pin hole. I drilled small drain holes in the bottom to allow accumulated water to drain out. The holes will all eventually be plugged and the sealed bumper tube used for air storage (see below).
- The welded on wheel mounting studs fatigue over time (they use coarse threads) and the raised bolt head doesn't allow the wheel to be support solidly. After one stud sheared off, I cut and ground the existign studs back to the base metal, drilled and tapped 1/2" NF holes and inserted some Grade 5 bolts from the back side and used aero locking nuts. Now spare bolts can be carried and replaced easily.
- The welded-on tow shackles hung down too far and rattled too much, unless I tied them up. So I ended up cutting them off and now use a shackle attached to the 2" receiver to replace them. I may re-attach the shackles up higher on the bumper at some time but I think the hitch-mounted shackle is more functional.
- I also cut the receiver flush with the bumper face to improve the departure angle. I found a stock receiver hitch, that when inverted, makes a nice tow shackle mounting point. Installed in the receiver, it also protects the jack and spare tire when dragging the bumper.
- I plan on welding some angled brackets below the ends of the jack to cover and protect the ends from trail damage. With my 60" HiLift, it goes nearly end to end on the bumper and a few times I've scraped it on rocks.
- I tie wrapped my spare tie rod to the HiLift jack brackets and now it is always with me.
Futures:
I was planning to get a custom-fit cover made for the tire to keep the UV off the rubber, but don't think I will. The holes in the rim allow a bit of rear visibility and also allow air flow when the top is off.
I plan on remounting the bumper in closer to the tailgate to improve departure angle. To do this, I'll reposition the tire carrier pivot and latch to rest outside the bumper. It will function exactly the same, just 2" farther back, then I can trim the plastic door handle for another inch and end up moving the bumper forward 3". This will tuck it up under the tailgate. In addition, I can shorten the pivot bolt so that the jam nut no longer protrudes below the bumper and gain about an inch of clearance. While I'm at it, I'll tack on some additional mounting brackets on the tire carrier frame hold a real shovel and my Pull Pal.
With the latch moved outside the bumper, I should be able to plug that hole and use the bumper tube for an air tank, of about 3 gallons capacity. Between the front and rear, I'll have 5 gallons, which should speed air up times considerably over my current 1 gallon tank.
When I was looking for rear tire-carrier bumpers I found nothing. Today, there are a few other options on the market. One popular one that has started offering 4Runner bumpers is Stout Equipment, ORC did an article on them recently. The Stout bumper does look nice, I think the tire is carried too low for my tastes, and the swing out carrier is full width. Often carriers with gas cans split in the middle to reduce the swing out distance. I have no interest in the gas can carrier feature. It also lacks any side and corner protection, which is a vulnerable area on the 4Runner. While I relocated my license plate (probably was OK where it was) I didn't need to fool with the lights for it, while the Stout unit requires it be moved.
I decided to sell this bumper and tire/jack carrier. Why you may ask? Well, as I mentioned in the installation, I set the brackets up to exactly fit the 1" body lift I am currently running to maximize my departure angle. Well, I changed to a 3" b/l and I would either have to re-make the brackets for that lift, or else get rid of the bumper and make a new one along the same lines. Since 1/2 the bumper cost was in the brackets, I felt it would work better to sell the bumper/bracket combo, and it has been sold.
[Back to the top]
![]()
CB Antenna:
The top arm of the tire carrier looked like an ideal place to mount a CB antenna, I went with a 48" Firestik-II 5/8 wave antenna along with a mounting bracket, base spring, and 18' of RG-58 A/U coaxial cable. I drilled and tapped two holes on the top arm of the tire carrier for the antenna mounting bracket. The antenna cable runs down the carrier arm, under the tailgate and up into the cargo area through the tailgate wire grommet. The antenna is above most of the metallic parts of the vehicle and this location is nice and quiet electrically.
Cost: $53 (Antenna, co-ax, and mounting hardware)10-4 good buddy!
NOTE:
The length of the antenna is important. Ideally, the longer the better. However, many organized off-road runs limit antenna lengths to 48"-54" or less in length for safety reasons. Bystanders and spotters can get injured when 108" whips start thrashing around. So that's why I went with 48" and I liked the Firestik because it is very heavy and won't easily get damaged by scraping on the odd tree limb or parking garage ceiling.
UPDATE:
I ran the antenna like this for about 6 months then noticed my transmit capabilities were reduced. I tested the continuity from the carrier to the frame and found it was good. I then assumed my radio was bad, so got a new one (with a built-in SWR meter). The SWR reading pegged the meter - not a good thing! Perhaps a bad meter, after all, it was a re-mfg. radio. So I got another SWR meter and it read off-scale, too. Came to the conclusion that DC continuity does not equal RF continuity. Perhaps the accumulated rust, grease, and dirt between the antenna and the ground plane of the body was not as good as it was when freshly installed. As a further test, I clamped a heavy cable from the antenna base to the frame and the SWR improved into the 2-3 range, but this is still not good.
So, I decided to move the antenna to the body sheet metal. This is easy to do when the shell is off, so I took advantage of the summer topless condition of my truck and did a quick antenna mount, inspired by Scott Wilson's design. I used some 1/8" flat bar for the mount and after sanding the mounting surface down to bare metal, I riveted and screwed the mount to the sheet metal. Unlike Scott, I chose to mount the antenna on the driver's side and to run the antenna cable out the tail light since my cable was already on that side. The tail light can be removed and the cable run out the grommet that already exists inside. I just made a small notch in the inner sheet metal lip and in the tail light frame to accommodate the coax.
Upon re-testing the SWR, I found I had under 1.1 from Ch.1-40. I have subsequently re-mounted the shell and have a tip for placing the bracket. The shell has a rubber seal that rests on the raised flat part of the side of the bed. If you place the mount on the lower, slightly sloping part, the rubber seal will be unaffected. However, since the side does slope a bit, it is necessary to put a slight opposite bend in the bracket to let the antenna sit vertically for best operation.
[Back to the top]Winch:
Well, I bit the bullet and ordered a Warn XD9000i winch. A fellow Toy4x4 list member found a shop in Kent Washington (TC's Off-Road Center) with this winch on sale. Even with shipping, it was over $100 less than any comparable price I could find. While 9000 lbs. is way more than I need, I did like the fact that at comparable loads, this winch draws less current than 8000 lb. or 6000lb. winches. It also holds 125 feet of cable, vs. 100 for many others, and has a low profile (plus my bumper is pre-drilled for the Warn winches). It also has about twice the line speed at the top end.
| Load/Model | 6000 | 8000 | 8274 | 9000i |
| 0 | 85 | 70 | 68 | 65 |
| 2000 | 175 | 180 | 172 | 150 |
| 4000 | 360 | 263 | 268 | 210 |
| 6000 | 465 | 342 | 360 | 270 |
| 8000 | n/a | 423 | 435 | 350 |
| 9000 | n/a | n/a | n/a | 400 |
Here's an excellent winch comparison chart:
I installed the winch in about 3 hours. It would have taken much less time, had I not partially covered some of the mounting holes when I mounted the front bumper. Anyway, I had to pull the bumper and cut some notches in the 2" angle mount to let the winch feet rest flat on the bumper platform. I also took this opportunity to re-drill the mounting holes for the roller fairlead, to get it in the center of the cable cutout. I suspect the Warn 8000 winches have a different fairlead mounting hole location. With the bumper back on and bolts torqued, the winch dropped right in place. All the holes lined up perfectly. I ran the 2 ga. power cables under the grill, beside the radiator, over the wheel well to the battery. The lugs attach right to the battery clamps, both positive and negative. Don't try hooking the ground to the body or frame, as a serious ground loop could result. With 200 lbs. of bumper/winch balancing the rear bumper/tire/jack, the truck feels more balanced now.
Of course, adding a heavy load like a winch, will require some beefing up of the electrical system. While it looks like I might be able to >squeeze< a second Optima battery up front (by relocating the windshield washer tank), I may instead go with dual 800CCA Black Panther batteries. They are 1.5" shorter than the Optimas (allowing two to sit side-by-side w/ the tank in place) and have better deep-cycle characteristics. My stock 60A alternator will not be up to the charging job, so I picked up the 160A Premier Power Welder/alternator.
Finally got to try the winch out (to get me out of a bad spot). I was driving up a washed out road, driver's side in the rut, passenger side on the old road bed, about 30 off camber at this point. The stream turned off the road, meaning I needed to climb out. While I had traction to climb the rut, doing so tipped me to 40+ tilt. Got another vehicle to come down in front as a anchor, hooked up the cable and winched/drove out. An excellent guiding/winching job by Tom Kay. Since then, I've used the winch to recover my own and other vehicles numerous times. It is such a handy tool, I wonder how I got by without it. Tow straps are great if you have room to maneuver and traction, but in tight quarters or places that good traction is 100 feet away, a winch is the tool of choice.
Winch cost:
  Warn XD-9000i    $719
  Shipping           40
-----------------------
                   $759

Note: The Wincher bumper comes ready to mount a winch.
      No mounting kit is required, a $75 savings.
UPDATE:
I've since removed the roller fairlead (I carry it in my tool box just in case) so that I don't smash it against trees and rocks. In its place, I looked to get a Hawse fairlead, but couldn't find one wide enough to replace the roller. So, I took a grinder and rounded the 1/4 steel plate surrounding the hole and made a built-in Hawse fairlead. I've used it several times now and have had good results and no cable damage. If I do need to do a severe off-angle pull, it takes about a minute to bolt the roller to the bumper. I have drilled and tapped holes for pipe fitting and have plumbed the front tubes for air storage. It holds 2 gallons of air at 100psi no problem.
I plan to install some quick connect power connectors to the winch power leads when I get my dual battery conversion done. This way I can keep the winch disconnected except when on the trail and the connector will make a handy point to attach jumper cables, etc.
[Back to the top]
![]()
Auxiliary Gas Tank:
I've been looking at adding an auxiliary gas tank because there are places where it would be nice to have some extra range. For example, several roads I plan on driving in Alaska and Canada have up to 450 mile stretches with one gas station (if its open). The thought of carrying 10 gallons of gas in the back does not appeal to me (or some states), plus the rear bumper lacks gas can mounts. Now that the spare is gone, I have loads of room for a tank back there. I've already removed all the spare tire carrier bits and cleaned, primed and painted all the newly exposed metal. Looks absolutely spacious under there. Northwest Metal Products makes an excellent line of auxiliary tanks that fit in the spare tire location and allow a spare tire to still be carried there.
[Back to the top]
![]()
Nerf Bars...
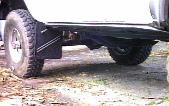
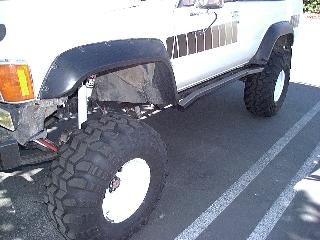
...are kind of like bumpers, 'cept they go on the side of the truck. Since my rocker panels are still in good condition, I decided to get some low profile nerf bars to keep them that way. I didn't like the 3" tubular bars, most stuck out too far or were for looks only. Short of going for a custom design, I happened upon American Metal's Rock Sliderz. Their bars are designed for strength and low profile using only 1.5" tubing. They use double tubes for added strength and protection. They fit tight to the lower body seam and only the outer tube projects beyond the body. With my 1" body lift, the lower edge of the bar is about 1" above the bottom of the frame.
After a long wait, the bars arrived and I unwrapped them. The welding quality is excellent, no voids or spatter. The bars are sandblasted and heavily powder-coated.
The bars are attached to the frame with two brackets and a total of 8 bolts. Drilling the upper ones is a bit tricky with the angle. I may ultimately weld the brackets to the frame but they seem to hold fine. I tried jacking up the truck with the bar and it worked. The bars do flex upward a bit, but soon the inner tube contacts the lip of the body along its entire length for support.
I installed a 1/4x20 RivNut in the front of the nerf bar and used it as one of three attachment points for front mudflaps. My stock ones, if they ever existed were long gone. I placed the front of the nerf bar just behind the body mount bracket behind the wheel well. The flap is bolted to the bracket, the end of the nerf bar and then to a length of aluminum stock for support. The flap is now several inches behind the wheel well to hopefully keep it from getting torn off under compression.
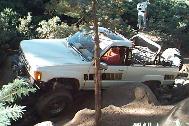
Nerf bars are worth their weight in gold. Here, I am rounding "Pinch Rock" on the Rubicon Trail (photo courtesy of Chris Geiger). Try as you might getting uphill of this rock, gravity and a dusting of loose dirt on the rocks will slide your rocker panels down onto this rock. Not only does the bar protect your truck's body from damage, but it makes a nice pivot point to make this sharp turn. The bars emerged from the Rubicon un-bent, with only minor scratches in the powdercoat.
UPDATE:
It seems American Metal is no longer in business and I used this basic design with some modifications and produced my own nerf bar design:
- Make them project out another inch or two from the body
- Include a "kicker" at the back end to help protect the rear fenders
- Use square tubing vs. round in the design
If you are interested in a set, ccheck out the details on the 4Crawler Offroad PRoducts page.
[Back to the top]
![]()
Summary:
In other words, how do they work?
I the words of George Jefferson:
"I pity the poor fool who finds out!"
So far, the bumpers have performed as advertised. I've not had any major trouble with approach angle. With the tow hook now mounted on top of the bumper, I've been winched up a vertical waterfall in Stone Canyon in Panamint Valley and have yanked a Defender 90 that was buried to the hubs in wet snow.
With the extra weight of the rear bumper/spare/HiLift cantilevered out in back, my "4Runner-butt-sag" is back. The tire carrier latches up really solid (no rattles) and I can adjust the pivot tension (via the jam nut). I can set it up to stay in position even on a sidehill. The rear bumper hit a few rocks in the Panamints, quite a few rocks on the Rubicon and has fared very well. My departure angle is nothing to write home about, but the bumper seems more than able to take the abuse it receives and so far it has not hung me up. I've never scraped the tire on the ground, but one time I did hit it on a tree backing up (prompting the replacement of the welded on mounting studs). I plan on relocating the tire carrier pivot point to the outside of the bumper which will then allow me to push to bumper forward 2-3" increasing the departure angle. I'll also be moving the adjusting nut up above the bottom of the bumper for the same reason.
I really like the basic design of the bumpers. They are simple and strong. The simplistic design makes it easy to make modifications to adjust them to meet my needs.
- BTW:
- The original front and rear bumpers have been sold to Toyota-4x4 mail list members.
![]()
Visitor # 212399 since 18.MAR.2002
[Last updated: 02.August.2022 ]
![]()





 ===>>
===>> 