Custom Air Intake Snorkel
Introduction:
The goal of a snorkel is to move the point where your engine is drawing in air, to a better location, in hopes of not ingesting water or mud during stream and lake crossings. Some snorkels move the point where the air is taken in all the way to the roof. The following design draws air from the rear of the engine compartment, rather than from the original place behind the front grill. I took my ideas from two similar designs I had seen:
- Allen Jensen's Toyota V6 snorkel
- Randy's Jeep air intake mod - if someone has a new location for this page, let us know.
- Chris Geiger's snorkel-in-the-fender design.
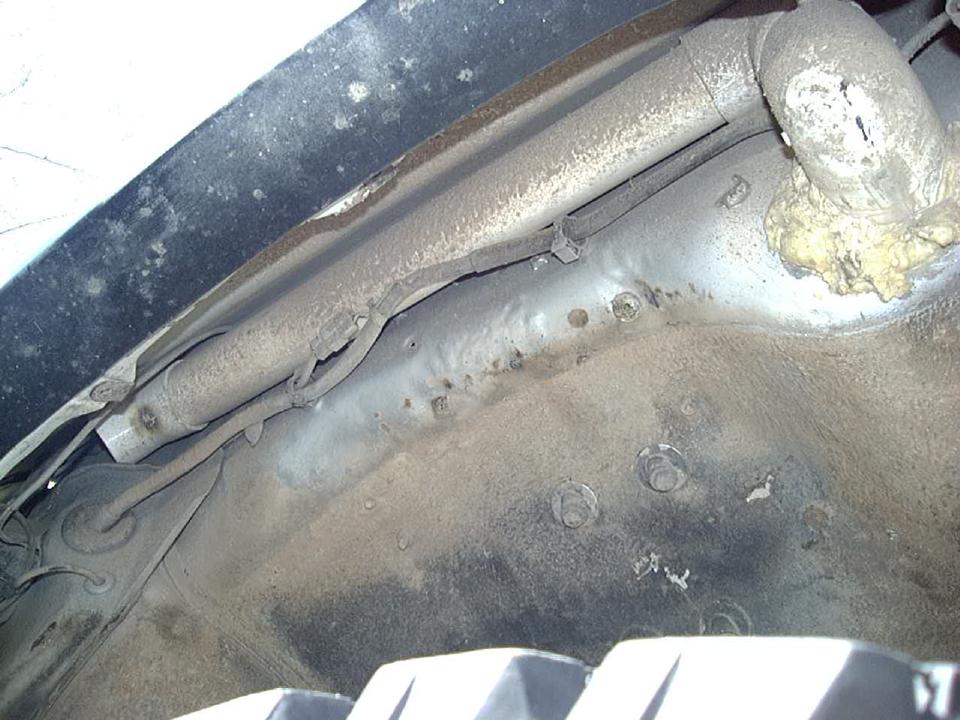
In my 4 cylinder 1st generation 4Runner, the air intake is on the inner wall of the air box, not on the outer wall like in the later V6 engines. This made the route through the fender that Allen used impractical, plus I had placed my hot water shower heat exchanger inside that fender and didn't want to move it.
So, my snorkel project progressed through a number of phases:
Phase-I:
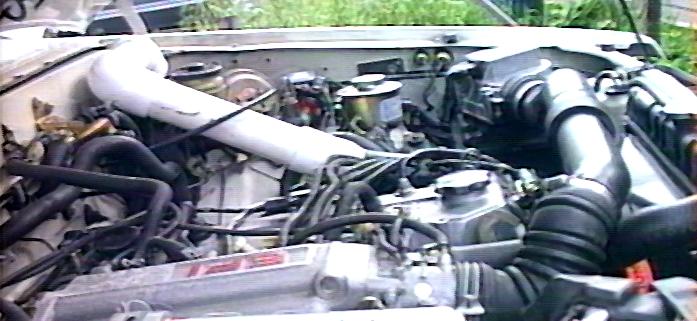
I recalled Randy's slick fix of just rotating the air inlet on his Jeep back and up. I tried that and while it did the move the intake point away from the grill, it did not move it much higher and the intake point was right above the exhaust header. After cleaning up the routing of wires and hoses in the engine compartment, it looked like I could run a length of 2" PVC pipe from the stock intake pipe to the firewall, then angle over towards the fender.
To fabricate the snorkel, I used 2" Class 125 PVC pipe, a coupling and a 90 and 45 degree elbow. The longest pipe section is 11" the short one is 5". I cut off the end of the stock air intake tube to get to a round section. The stock tube fits nicely inside a 2" pipe fitting, where I glued it in with Liquid Nails*! The stock pipe is polyethelene, so PVC cement won't work. When the hood closes, it holds the end of the tube down, so it just sits on top of the brake booster. I see no need yet to firmly attach it to anything. This also allows the snorkel tube to be removed if additional working room is needed.
* Attaching the poly tube and PVC pipe is a bit tricky. The PVC is rigid, the poly is flexible. I used the Liquid Nails to to fasten the tube inside the PVC fitting, then added a strip of polyester fabric over that and covered it with another layer of adhesive. Then the assembled tube was baked in an oven at 175°F. for several hours to cure it. It remains flexible yet doesn't pull apart under tension.
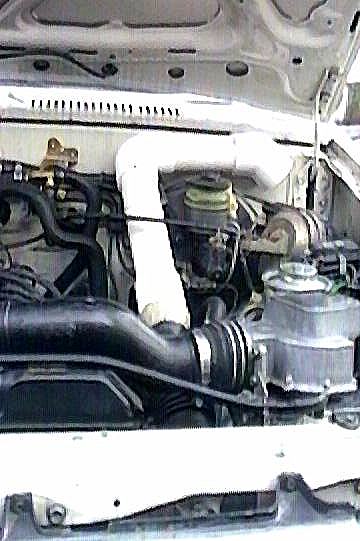
The air intake has been moved about 6" higher than stock and back about 2'. In the 2nd picture (below), you can see the 2" round hole behind the grill where the stock intake tube used to sit. The corner of the fender and firewall seems like a good air pocket. I haven't had an opportunity to test the setup in deep water, but at least now I'm ready for it when I get there. The snorkel does not contribute any additional intake noise. Below 4-5000 feet, there is no affect on engine power, but above that, I notice a very slight drop. Since it only takes 30 seconds to install or remove, I think I'll just carry it with me and stick it on when needed. I do notice that if I remove the snorkel and leave the lower end attached, the engine runs a bit hotter (air intake close to the exhaust manifold). This doesn't happen with the full snorkel on, so I guess the intake point is cool enough, but I do notice a bit of power loss at altitude.
Here's what it looks like installed:
- Note:
- Little sheet metal was harmed in the making of this snorkel! I only had to enlarge the hole by the radiator to allow the now larger intake pipe to fit through for normal operation.
Cost:
  2' 2" Class 125 PVC pipe             $1
  3  2" Schedule 40 PVC pipe fittings   4
  ---------------------------------------
                                       $5
Rating:

Phase-II:
While the design above worked well (I still have the parts if anyone is interested in them), I didn't like the stock air intake location. It was fine when I had the full snorkel in place, but it seemed you'd be nose-first in the water before you remembered. Also, up front, I found my K&N air filter clogged with dust and bugs getting sucked in.
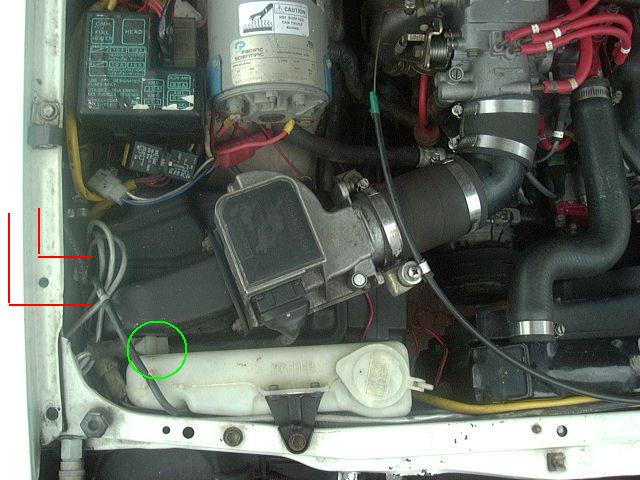
So, I had a plan to improve upon this design. Once I got my dual batteries installed underneath the truck, I'll freed up the old battery tray area. I ripped out the corroded remnants of the tray and then relocated the air box to the passenger side. I did have to cut and extend the 7-wire cable feeding the air flow sensor on the airbox. This was the most time consuming part of the job, but I made it easily reversible, by using mating 8-pin Molex connectors (from Radio Shack) soldered to each end of the extension (used a pair of 4-conductor intercom/phone wire cable for the wiring, because that is what I had on hand at the time - probably purchased at Radio Shack as well). This way I was able to check the splicing with just the existing wire harness by plugging it back together, then the extension cable was easy to do an end to end test for continuity (pin1 to pin1 and so on). I've observed no problems in many years of use, no increased resistance, it works very well. In picture A below, the red lines show where the air intake routes out through the fender. The green circle is around the connector where the wiring harness extension plugs in:
 |
 |
 |
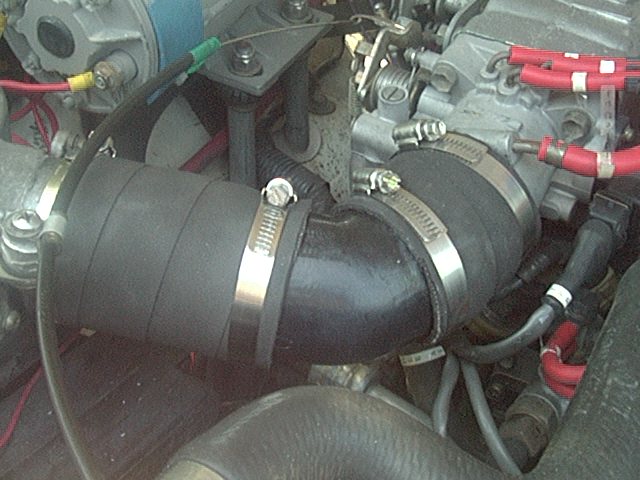
| A: View of relocated air box | B:Closeup of short air intake tube | C: In-fender intake tube |
The relocated air box will allow two improvements to the air intake:
- The long stock crossover pipe can be replaced by a very short 45° elbow as the air box and throttle body will now be on the same side of the engine. 2.75" ID coolant hose was used to fabricate the connecting sections. Parts to preform this conversion are available, contact me for more details. The 2.75" ID rubber hose costs US$24.00/foot ($2.00/inch) and we can cut it to whatever lengths you want for $1.00/cut. Postage will vary with amount of hose and shipping destination.
- The air intake hole will now be against the passenger side fender all, which is a convenient place to cut through and run the snorkel pipe along inside the fender, in a similar fashion to the infamous AJ Snorkel design.
These two modifications should allow me to leave the snorkel attached full time, as I'll be taking in cooler outside air, with about the intake restriction of the stock setup. The snorkel is built out of 2" PVC pipe, a short stub and a pair of 90° elbows make the transition out of the air box, through a hole in the fender wall and up above the wheel well liner. A final 45° elbow pointed down ends the snorkel tube at the power radio antenna. I used some spray-in foam insulation to seal up around the tubing where it passes into the engine compartment and some silicone seals the inside of the air box. I've noticed no change in power with this setup, although I think I can hear a slight noise from the intake, now close to the passenger door. Cost was only a few $ more for some extra elbows, if I hadn't have glued the old one together, I could have re-used them.
This will also free up the old airbox location to let me install the Premier Power Welder control box and regulator near the shiny new 160A alternator.
Phase-II.5:
So, I got tired of the air filter filling with dirt every few trips and decided to route the snorkel into the cowl area. I picked up a 3" hole saw and cut a hole large enough for a 2" 45° elbow (circled in green in the image below) and inserted a coupling onto the end of the old tube and violà, cleaner air! There is what appears to be a drain hole, so I inserted a few pieces of 1/2" plastic tubing (circled in red in the image below) then foamed in the rest of the opening. This is important to allow any water that might get into the cowl area to drain out before reaching the level of the air intake pipe. As you'll note below, the level of the drain tubes is below the level of the air intake tube:

Now the engine air comes in through the vents under the windshield wipers and runs along under the fender to the opening (circled in blue in the image above) into the engine bay. This relocated intake point gives the air filter some cleaner air to breathe and with the high pressure over the cowl area, it may help to force a little more air in at speed. I've not really noticed any difference in engine output with the various intake configurations and I can easily pull my vacuum gauge to 0" when I floor it, so I don't think the intake is a limiting factor on engine output. Also, since the cowl is a mostly sealed volume, the effective air intake height is now just at the bottom of the windshield and that puts it about 10" higher than stock and more importantly about 3-1/2' farther back. This really helps when you have to drop nose first into a water crossing. It is not uncommon to sumbmerge the whole front end of the truck for a few seconds when doing so, even if the water is only bumper deep when sitting level.
Cost:
  3'   2" Class 125 PVC pipe             $2
  3-4  2" Schedule 40 PVC pipe fittings   4
  -----------------------------------------
                                         $6
Rating:
Phase-III:
At some point in the future, I may go all the way and cut a hole in the fender to allow a full roof line snorkel intake. I'll probably use a Safari snorkel for a right-hand drive 4-cyl. diesel 4Runner/Hilux, in order to get the fittings for the right side of the vehicle.
Update: I have a Safari model SS135HF snorkel on order from Australia, its for a right hand side mounting on a late model Hilux. Hoping the roof lines are approx. the same as my '85 4Runner, I plan on fabbing up whatever adapters are needed to mate my custom intake to the snorkel tubing. Stay tuned for updates as this project progresses...
Back to my Cheap Tricks main page.
![]()


Visitor # 88428 since 28.AUG.2001
[Last updated: 22.March.2021]