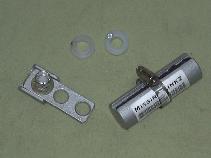
VW A1/A2/A3 Shift Linkage Upgrades
 Designed and manufactured in
the USA by Visual Diagnostics LLC
After 25 years in operation, it's time to close up shop and move on to other adventures. Thanks to all the loyal customers over the years that helped to make this all possible. The web site will remain live.
We have a limited stock of items such as steering and driveshaft spacers, Bilstein shocks available. Let us know what item(s) you're looking for, where and how you'll want them shipped to and we'll get back to you with a shipping quote and purchase information:
| 4Crawler Offroad contact link | MissingLinkZ contact link |
A1-Mk1/A2-Mk1/A3-Mk3 Transmission/Shift Linkage Kits:
- Introduction
- Short throw shifter
- Weighted shift rod kit
- Shift Linkage Upgrade
- Relay Shaft Bushings
- A1/A2/A3 Shift Rod Bearing
-
 A1 Relay Shaft / Lever Replacement
Ball
- A2/A3 Relay Shaft Ball Cover
- Replacement Ball Studs
- Pricing Information
- Frequently Asked Questions
- Installation Instructions
- Return location for completed order, thank you.
Introduction:
Don't be intimidated by the length and detail of the this web page. Unlike many shift linkage kits where they they just show a picture and one line description of the shift kit, the intention here is to educate you, the customer, as to how the VW shift linkage works, why and how the various components of the upgraded linkage kit were designed and why they might be of interest to you as the end user. This way you can make an educated decision as to what parts you might need and what benefit you can expect from them. If you just want to order the "full kit", you can jump right to that section of the web page...
If you look closely at the water-cooled VW shift linkage, it is truly a marvel of mechanical design. It transmits the front-back and side-side motion of the shift lever on the floor of the vehicle into motion on selector shaft of the transmission, to allow shifting gears. Front-back motion of the gear shift is transferred as back-front motion of the shift rod which in turn is translated into left-right rotation of the relay shaft which in turn is translated into a rotation of the selector shaft. Side-side motion of the gear shift is converted to rotation of the shift rod, which is converted to a left-right motion of the rear selector rod then to a front-back motion of the front selector rod which pushes and pulls on the selector shaft of the transmission. Click on the image(s) below for a detailed view of a typical A1 or A2/A3 shift linkage:
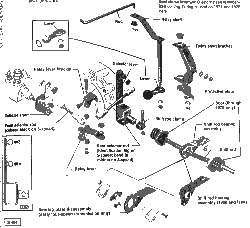 |
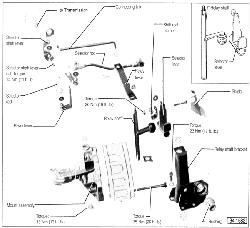 |
| A1: Shift Linkage Diagram | A2/A3-020: Shift Linkage Diagram |
Note, that the perspective on the A1 diagram makes it hard to see the
bends in the rear selector rod, but the 4-speed rod will have a single
bend while the 5-speed rod has 2 bends. These bends are needed to clear
the steering column as it connects to the rack and pinion steering
unit.
In the illustration below (courtesy of Anton Allen), you can see how the shift linkage can be made to work at its optimum level of performance with the various items available on this web page. This is a diagram of the A2 shift linkage, but is similar for the A1 and A3 vehicles:
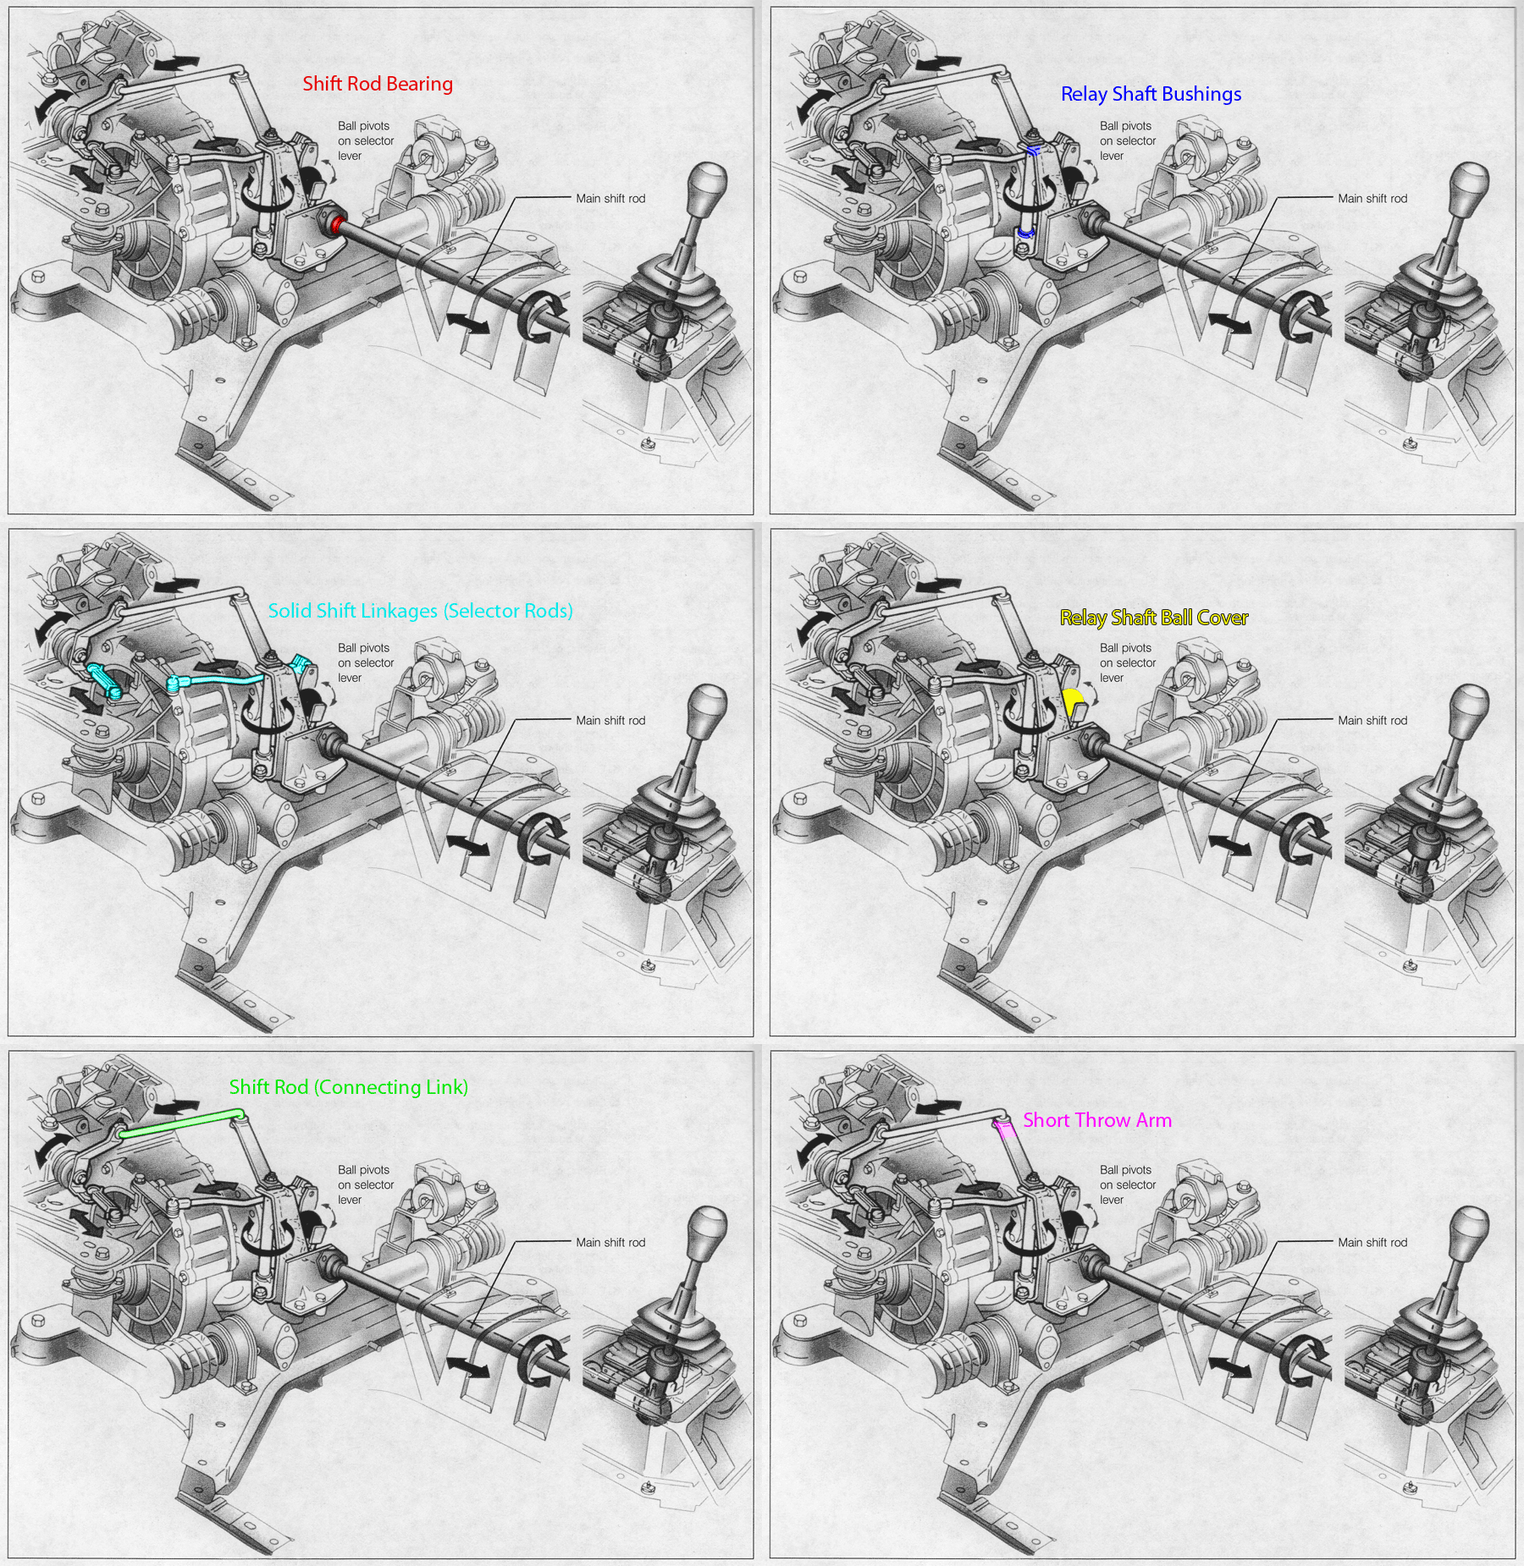
Theory of Operation:
The shift linkage is made up of two main parts, the rear part is the shift lever, gates, and reverse lockout and the rear shift rod that runs from the shifter up to the engine bay. This rod both moves back and forth as well as rotates, so has 2 degrees of freedom. The second part of the linkage is the forward linkage. Its purpose is to split up the linear and rotational motion of the main rod into two discrete components.
The selector lever is clamped to the end of the rear shift rod and has a ball stud on the end that converts the rotational motion into a side-side motion that gets transferred via the rear selector rod to the relay lever (or bell crank) which converts the side-side motion to a fore-aft motion which is transferred by the forward selector rod to the selector lever on the transaxle. The selector lever is what "selects" the various sections of the gearing; R, or 1-2, or 3-4, or 5(-6) gear sets.
The second component of the forward shift linkage is that the selector lever has a cage on it that captures a ball attached to a lever off the the relay shaft. This converts the fore-aft motion of the rear shift rod into a rotational motion in the relay shaft. The shaft pivots inside a pair of bushings (i.e. the relay shaft bushings). On the top of the relay shaft is an arm that converts the rotational motion to a side-side motion to which the forward shift rod attaches and then connects to the selector lever on the transaxle. At the selector lever, the side-side motion is converted back to a rotational motion that is used to select between gears within a set, for example 1st or 2nd gear.
If you look at the selector lever on the transaxle itself, the shifting motion is shown below:
Diagram of Gear Selection---- FRONT/TRANSAXLE ----+--> Reverse|2nd gear <--+--> 1st gear|4th gear <--+--> 3rd gear|+--> 5th gear----- REAR/FIREWALL -----
This diagram is laid out as you would observe the motion while standing in front of the vehicle looking down at the shift linkage. As such, it will appear to be reversed unless you turn the page upside down.
Background:
When I first got my '82 Caddy, the transmission and clutch were fairly new, but the PO had not done anything with the shift linkage. Shifting was horrible, I could only get into 1st gear at a complete stop and only by shifting into 2nd then repeatedly trying to reach 1st. Every stop light was a race to see if I could find 1st gear before the light changed. So, I set about to fix it:
- First thing I did was to replace the unknown grade/brand of gear oil with a GL-4 Redline manual transmission oil, I used MT-90 but MTL is also a good choice. The proper gear oil greatly improved my shifting while moving. Running the proper gear oil allows the syncho-mesh rings to do their job better to speed up or slow down their gears to mesh properly for easier shifting.
- Next, I pulled the gear shift boot and found the shifter base was not aligned properly to the holes in the floor. I loosened the retaining bolts and moved the base around until it aligned properly and tightened everything back down. I found this helped, but it was still not shifting as I would like it.
- I determined that the shift linkage was very sloppy, there was a lot of play and some of the bushings were completely worn out. I decided to order a full linkage kit and short throw shift kit from Techtonics Tuning. This was installed and the new bushings helped firm things up even more. However I felt there was still something more to be done to improve the shifting response.
- Next I ordered a shift linkage kit from TSR Performance on the UK. By replacing the non-adjustable plastic linkage with all metal adjustable rod end linkage, I was able to adjust out some problems I had in the 1st/2nd shift. However, TSR kit did not include either short throw or weighted shift rod, which I felt were a benefit, so I added my own. Even so, I felt there was still a problem, in that the shift from 1st to 2nd was still slow. After some detective work, I determined that the polyurethane bushings in the relay shaft bracket were flexing too much (even though they were nearly new) and allowing the relay shaft to rack from side to side too much. I felt a firmer bushing would eliminate this play.
- So, I fired up the lathe and machined a replacement bushing out of Ultra-High Molecular Weight Polyethylene (UHMW-PE). This is a material similar to Teflon/PTFE in that it is self-lubricating, and is commonly used in industrial applications for bearing and wear surfaces. After installing the two UHMW bushings and sliding the relay shaft in, the play was gone. The shaft can now only rotate and the 2nd gear shift was now as crisp as the other gears.
I went through a lot of time and expense trying various combinations of parts and I think I've finally hit upon the right combination that works well and is both affordable and available. More about how I developed the various components below. If you want to skip to the full kit, click here.
Race tested shift linkage suitable for daily driver use. Listed below are links to some product reviews/builds/projects:
- Barefoot Racing
- VW Vortex:
-
YouTube:
- Derek Spratt has an awesome '83 GTI build project video series.
Short Throw Shift Arm:
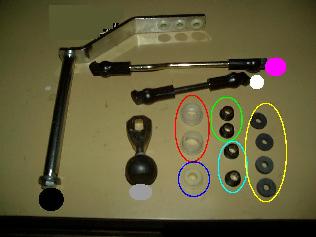
I initially had purchased a short throw shift kit from Techtonics Tuning. This was the deluxe kit that came with a full set of shift linkages and bushings. You can see the parts pictured below-left, quite nice quality and it cost about US$75 or so. In the below-right image, you can see how the short throw linkage is done. The upper arm is the TT arm, the lower is the stock. The rubber ball fits inside the long shift rod from the shift lever in the cab, and gets pushed back and forth as you shift say from 1st to 2nd gear. This causes the arm to pivot about the round rod which pulls and pushes on the relay rod what fits into the hole the end of the arm. TT offers a 12%, 31% and 51% reduced travel points (the 3 holes) compared to the stock arm. I found 12% felt like stock, 31% was nice and I loved 51%.
Unlike some short throw designs that reduce all the shifter motion, this design only reduces the front-back motion, the side-side gate motion is unchanged. This eliminates one major drawback of the shorten-everything kits, in that finding the shift gates is still like stock, only the motion inside the gate is changed. I found the biggest gain was in 5th gear, it is no longer over next to the passenger door, it is now within easy reach.
 |
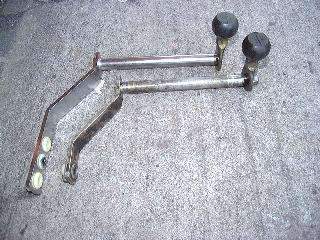 |
| A typical deluxe A1 short throw kit | TT short throw relay shaft (above) vs. stock (below) |
However, after installing the entire kit, it dawned on us that 95% of what I replaced didn't need replacing. In fact only two worn out relay shaft bushings needed replacement, everything else was fine.
What is included in the kit above?
- Black dot is the short throw relay shaft, this one has 3 positions, ~stock, ~25% and ~50% shorter than stock throw
-
Gray dot is a replacement lever for the bottom of the relay shaft
- The original 20+ year old lever was in perfect condition, it is pictured in the above-right picture)
-
Magenta dot is the bent rear selector rod
- Again the original link was not worn, same plastic and metal design as the new part
-
White dot is the forward selector rod
- Again the original link was not worn, same plastic and metal design as the new part
-
Red ellipse are a new pair of soft polyurethane relay shaft pivot
bushings
- These did need replacement, but seemed to get sloppy again after about 6 months use
-
Blue ellipse is a new rubber bushing for the forward selector rod (the
other ones are in the relay shaft)
- The original parts were in OK shape, the new ones were actually softer than the old parts, which made for sloppier shifting
-
Green ellipse are a pair of hard nylon bushings for the relay lever
- The old and new part looked identical, the old parts were reused along with a shim to take up the gap
-
Cyan (blue-green) ellipse is a pair of hard nylon bushings for the end
of the main shift rod where it attaches to the shifter
- Again, the old parts appeared totally unworn and were not replaced
-
Yellow ellipse are 4 neoprene rubber washers that go under the stock
plastic rod end sockets
- The old parts were again fine and it seems the only purpose of these washers is to make up for the loose fit of the plastic sockets on the ball studs.
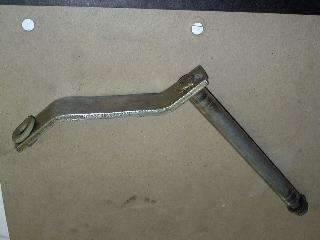
And, it also seemed strange to be replacing stock parts that were badly worn with parts that were essentially the same design as original. If the original part wore out, it must be somehow improperly designed (or not designed for the long lifetime of the vehicle). So why spend time and money swapping in parts that are going to wear out again? I also noticed the quality of the factory hardware was better, for example, the locking nut on the bottom was more secure. Plus, I reasoned that the stock arm (known as the relay shaft) could be lengthened for a lot less $$$ than making a whole new arm. So this got us thinking...
 |
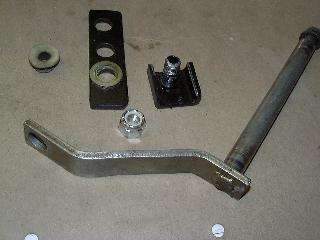 |
| How about you take the stock relay shaft.... | Remove the polyurethane bushing and make an extension that fits over it.. |
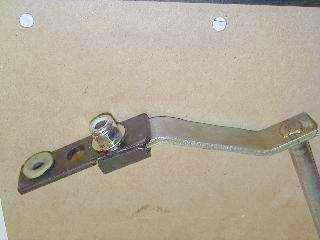 |
| Result, instant bolt on short throw shifter!!! |
Put the bushing back in and voilà, a short throw shift arm with ~25% and ~50% shorter throw points. If you want the stock shifting position, then just remove the arm (or don't buy it in the first place).
Notes:
- Pictured is the A1 style relay shaft, but the short throw arm will bolt to the A2/A3-020 style relay shaft as well
-
The A2/A3-020 relay shaft arm is longer than the A1, the shift throw
reductions are somewhat less
- On the A3-020 with factory weighted shift rod, you may need to reposition the rod, flipping and turning it 180° to avoid binding, the other option is to install the billet weighted shift rod which allows for more flexible mounting options
-
Although the relay shaft is pictured, above, only the bolted-on short
throw extension is included in the kit
- By not replacing the entire relay shaft, I save on manufacturing cost and thus can offer a fully functional short throw kit for a very low cost.
After 25 years in operation, it's time to close up shop and move on to other adventures. Thanks to all the loyal customers over the years that helped to make this all possible. The web site will remain live.
We've SOLD OUT of this item.
Order on-line, cost for the short throw shifter arm is US$15.00 +
shipping.
Ships in 1st class parcel
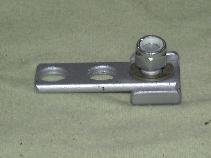 |
| SOLD OUT |
We've SOLD OUT of this item.
If you have worn out relay shaft bushings, you should replace them to
get the full benefit of the shortened shifter throw. Replacement
bushings, machined from UHMW-PolyEthylene, that are stiffer and more
durable than the soft urethane stock units (see below) are an improvement over
stock. Add a pair of relay shaft bushings to your short throw arm order
for US$10 additional or US$25 extra for Teflon/PTFE bushings:
Ships in 1st class parcel
| Short Throw + 1 pair UHMW Relay Shaft Bushings - US$25 + shipping |
Short Throw + 1 pair Teflon/PTFE Relay Shaft Bushings US$40 + shipping |
| SOLD OUT | SOLD OUT |
| SOLD OUT | SOLD OUT |
| Short Throw + UHMW Relay Shaft Bushings + A2/A3-020 Relay Shaft Ball Cover (UHMW) - US$35.00 + shipping |
Short Throw + Teflon Relay Shaft Bushings+ A2/A3-020 Relay Shaft Ball Cover (UHMW) - US$50.00 + shipping |
| SOLD OUT | SOLD OUT |
| SOLD OUT | SOLD OUT |
16V Note:
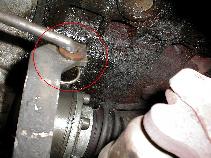
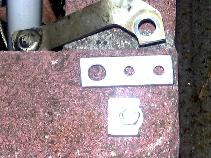
Some VW models have a slightly different shift arm, notably the 1986.5-1988 Scirocco 16V (pictured below - A - circled in RED). And how to tell if this applies to your vehicle? Simple, pop the hood, stick your head underneath and look down behind the engine at the shift linkage and see what you have, either the angled arm or a simple straight version.
 |
 |
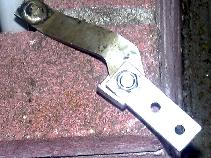 |
| A: Typical 16V relay shaft | B: Modified short throw clamp | C: 16V short throw |
We've SOLD OUT of this item.
With the bent end on the shift arm, the bolt-on short throw arm will
not fit directly. It is easy to adapt the bolt-on arm to fit, by
grinding/cutting off one side of the lower clamp, so instead of being
"U" shaped, it is now "L" shaped. If you have
already ordered a kit with a normal short throw arm/clamp, you can add
the modified short throw shifter clamp for an additional US$5.00 with
the button below: (note that this is just the cost to modify the short
throw arm in an existing, unshipped order, not the whole arm itself)
Adjustable Short Throw Arm:
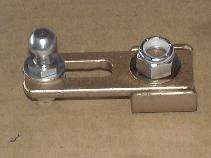
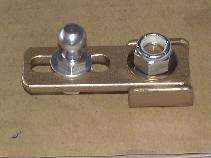
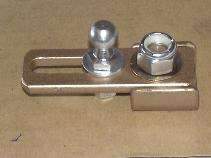
By combining the bolt on short throw arm with the ball stud mounts for the Missing LinkZ adjustable shift rods (see below), I'm now able to offer a fully adjustable short throw arm. By simply moving the ball stud from one end of the milled slot to the other, you can select any degree if shift throw reduction desired. The adjustment can be done with a pair of 13mm wrenches from the top of the engine bay.
After 25 years in operation, it's time to close up shop and move on to other adventures. Thanks to all the loyal customers over the years that helped to make this all possible. The web site will remain live.
 |
 |
 |
| ~50% reduction | ~37% reduction | ~25% reduction |
 |
| Adjustable Short Throw |
Note that the adjustable short throw arm must be used with some form of ball-stud-based shift rod. It will not work with the stock A1, A2 or A3-020 shift rods. It will work with the TSR linkage or with the MissingLinkZ as pictured above. For details on pricing of the adjustable short throw arm and the other Missing LinkZ shift linkage components, consult the pricing and options section.
[Return to the top of this page]A1/A2 Weighted Shift Rod Kit:
So, I had all new shift bushings and this way-cool short throw shift kit. Life was good, the shifting was so much better than the hit or miss (mainly miss) shifting that I had before. However, one drawback of a short throw shifter is that you are trading motion for effort. That is the shift rod is moving just as far between 1st and 2nd gear, that's how the transmission works. However, you are only moving the gear shift lever 1/2 as far as before, you don't get something for nothing. The thing you lose is force, you only have 1/2 as much leverage on the shift rod as before.
The way to make up for the lost force is to look at the physics of the situation. Force is a mass times an acceleration. Since the transmission end of the linkage probably can't be made to move any faster than it already does (the syncros need time to work) the speed and thus the acceleration of the shift rod can't really change that much. However, the mass can. The stock rod is just a length of ~5/16" dia. steel rod with some plastic ends, plenty strong but not much in the way of mass. So, I knew places that made weighted shift rods, Autotech Sport Tuning has one, a sleek, powder coated job, but they want US$50 for a hunk of steel!
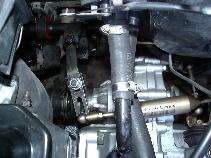
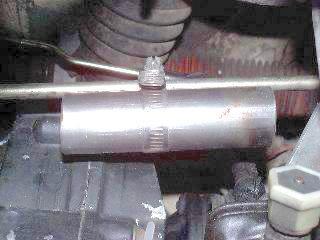
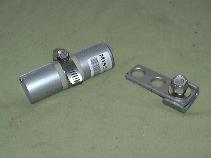
So, wefound some 1.25" cold rolled steel, cut off about 1.5 lbs. length of it, milled a groove in the top, and used a hose clamp to connect it to the shift rod. Works great and the shifting feel is so much nicer. The extra weight adds a solid feel to the shift and the momentum of the steel weight pushes the transmission into gear with little effort on the shifter.
- Notes:
-
A3-020 vehicles have a weighted shift rod from that factory, so the
clamp-on weight can't be used unless you install the non-weighted A2
style rod.
- While the weight is pictured attached to a stock shift rod, this is only to illustrates its operation. Only the weight and the clamp is supplied in the kit
If you want to experience the joys of weighted shifting, one can be yours for US$20.00 plus shipping (weight approx. 1.5 lbs) - SOLD OUT - Ships in Priority Mail flat rate envelope
 |
 |
| Order a clamp-on shift weight, US delivery | Order a clamp-on shift weight, Int'l Delivery |
If purchased with the short throw kit, above, both can be yours for US$30.00 + US$8.40 for Priority Mail shipping: Ships in Priority Mail flat rate envelope - SOLD OUT
 |
 |
| A1/A2 Weighted Short Throw Kit, US delivery | A1/A2 Weighted Short Throw Kit, Int'l Delivery |
If you have worn out relay shaft bushings, you should replace them to get the full benefit of the shortened, weighted shifter throw. Replacement bushings, machined from UHMW-PolyEthylene, that are stiffer and more durable than the soft urethane stock units (see below) are an improvement over stock. Add a pair of relay shaft bushings to your weighted short throw arm US$10 additional or US$25 extra for Teflon/PTFE bushings: - SOLD OUT
[Return to the top of this page]
Billet Weighted Shift Rod:
While the above shift weight is perfectly functional, it does lack something in the way of looks :-) For folks with the TSR or MissingLinkZ shift linkage, with the all-metal rod ends, who may want to have something a bit more fitting of their linkage, Missing LinkZ has developed a billet steel weighted shift rod.
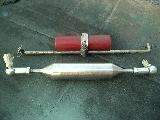 |
| Clamp-on weighted rod (top) Billet weighted rod (bottom) |
Pictured above, is the stock shift rod with a clamp-on shift weight attached. Below, is the all-in-one weighted shift rod with the rod ends installed. The weighted rod is machined from one solid piece of a special lead-bearing steel (a more dense, heavier steel alloy), the ends are tapered down to 8mm and tapped to match the thread pitch of the metric rod ends. The shift weight weighs in at 1.5 - 1.7 lbs. total.
And for A3 vehicles (or A2 vehicles w/ the A3 weighted shift rod installed), a conversion kit is available for US$20.00 which lets you convert your factory weighted shift rod to the balls stud/socket style rod ends. You'll need to cut the bent ends off the A3 weighted rod and thread about 1" of each end with an M8-1.25 thread cutting die (die available at an additional cost). Then simply thread on the jam nuts and rod ends and you have a weighted shift rod ready to install.
So what does it look like installed?
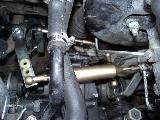 |
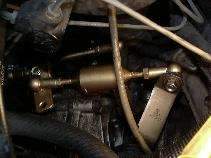 |
| A1 Solid shift linkage w/ billet weighted rod installed |
A2/A3-020 Solid shift linkage w/ billet weighted rod installed |
And how does it work? All I can say is WOW!. I never realized how sloppy the stock setup was. Even with all new bushings, (which made a huge difference) is was better but still imprecise. Now, the shifter clicks in and out of gear.
For installation information, see the Missing LinkZ installation section.
[Return to the top of this page]Missing LinkZ Shift Linkage Upgrade Kit:
We really liked the TSR shift linkage kit with the upgrades we had done to it. However, it took months and months to order with the group buy from the UK. So with some research and design work, MissingLinkZ was able to locate sources for all the components necessary to build a complete shift linkage kit. We were also able to fill in the missing parts in the original TSR linkage, including steel bushings to attach the new ball studs to the existing linkage, the short throw arm, the weighted shift rod, upgraded bushings, etc.
We call the linkage "Missing LinkZ" because we feel it incorporates all the design elements that are missing from the original VW design. Their design was probably constrained by economics and mass production issues and was adequate for the majority of vehicle owners. However after 10-20 years (or more) of use, the weaknesses of the stock linkage show through. It is sloppy, prone to wear and even if rebuilt with stock parts, rapidly returns to sloppiness. We imagine the fully-adjustable, all metal linkage was used in the engineering/design phases of the vehicle development. It was probably only in the final stages that the bean counters took over and reduced cost by replacing expensive metal parts with inexpensive molded plastic. By reversing the process, the true operation of the 020 shift linkage can truly be experienced. We doubt VW engineers were contemplating folks auto-crossing the lowly Golf when it was first designed. It was an econo-box; a fuel efficient commuter car, not a racy sports car. However, VWs are raced and look under the hood of most race VWs and you'll not see the stock shift linkage. Metal replaces plastic, adjustable replaces fixed, secure mechanical fasteners replace friction fits, etc.
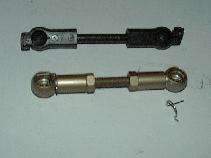 |
| A1 Front selector rod,: Stock above, all-metal below |
Above is an example of a stock shift linkage component and the all-metal replacement linkage. The stock linkage has plastic rod ends that are bonded to the rod, making them non-adjustable. The replacement linkage uses identical 13mm ball socket rod ends which are both spring loaded and have an additional safety clip that securely fastens the socket to the ball stud, unlike the stock plastic rod ends which only have a pressure clip on the end. Unlike the stock link, the replacement rod ends are on a fully threaded stainless steel rod and are fully adjustable for length and angle. Once set up, jam nuts keep them locked in position. Beware of some brands of adjustable linkages that OMIT the jam nut.
The adjustability is an important feature of the design. Due to variations in vehicles and transmissions, some links may need to be slightly longer or shorter than the fixed OEM links. For example I found that my '82 needed the above link lengthened about 2.5mm (2 turns out) to shift properly in 1st and 2nd gear. Now, you *could* do this adjustment by loosening the selector lever clamp on the shift rod and rotate is slightly and tighten the clamp back down. The problem is the precision needed to make this adjustment is on the order of 1° - 2° to affect a similar length change. Very hard to do this, especially laying on your back, under the car in poor light and without any way to measure the adjustment. I'd rather just get it close then fine tune it from above.
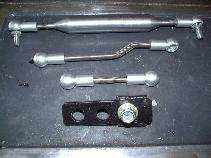 |
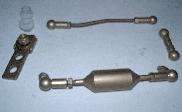 |
| A1 kit example: - Solid shift linkage - Billet weighted shift rod - Short throw arm |
A2 kit example: - Solid shift linkage - Billet weighted shift rod - Short throw arm - UHMW bushings |
Pictured above are examples of the Missing LinkZ shift kit, including weighted shift rod with ball studs, replacement front and rear selector rods with 13mm socket rod ends, all fully adjustable for length, plus a bolt-on short throw shifter arm, offering 25% and 50% shift throw reductions. Contact us for more information.
[Return to the top of this page]After 25 years in operation, it's time to close up shop and move on to other adventures. Thanks to all the loyal customers over the years that helped to make this all possible. The web site will remain live.
Shift Linkage Kit Options/Pricing:
We have a limited stock of items such as steering and driveshaft spacers, Bilstein shocks available. Let us know what item(s) you're looking for, where and how you'll want them shipped to and we'll get back to you with a shipping quote and purchase information:
| 4Crawler Offroad contact link | MissingLinkZ contact link |
Shown below is a listing of all the separate shift linkage upgrade parts available. Also some typical shift linkage kit combinations are shown further down this section of the web page:
You are not limited to the kits shown above, they are just some typical combinations of the parts below. Feel free to mix-n-match any set of parts from the table below. The price of your kit can be determined simply by adding up the prices of the individual components.
Small parts ship in a First Class parcel and larger parts in a Priority Mail flat rate envelope
| Component: | Price ($US) (5) | Application | |
| Solid Shift Linkage | $50.00 (1) | A1/A2/A3 (1) | |
| 2-pos. Short Throw Arm, add US$5.00 for 16V | $15.00 | A1/A2/A3 | |
| Adjustable S/T Arm, add US$5.00 for 16V | $25.00 (2) | A1/A2/A3 | |
| Relay Shaft Bushings/UHMW | $15.00 | A1/A2/A3 | |
| Relay Shaft Bushings/Teflon | $30.00 | A1/A2/A3 | |
| A1 Shift Rod Bearing/UHMW | $20.00 | A1 | |
| A1 Shift Rod Bearing/Teflon | $35.00 | A1 | |
| A2/3 Shift Rod Bearing/UHMW | $20.00 | A2/A3 | |
| A2/3 Shift Rod Bearing/Teflon | $35.00 | A2/A3 | |
| A1/5-Speed: Relay Shaft Lever Ball: | $15.00 | A1 | |
| A2/A3 Relay Shaft Ball Cover/UHMW | $15.00 | A2/A3 | |
| A2/A3 Relay Shaft Ball Replacement/UHMW | $25.00 | A2/A3 | |
| A2/A3 Relay Shaft Ball Replacement/Teflon | $55.00 | A2/A3 | |
|
Billet Weighted Shift Rod - SOLD OUT SOLD OUT |
SOLD OUT | $50.00 (5) | A1/A2/A3 |
| Clamp-on Shift Rod Weight - SOLD OUT SOLD OUT | SOLD OUT | $20.00 (3) | A1/A2 |
| Replacement Ball Studs SOLD OUT | SOLD OUT | $5.00/ea. (4) | A1/A2/A3 |
|
Replacement Safety Clips
for Ball Socket Rod Ends: US Postage |
Replacement Safety Clips
for Ball Socket Rod Ends: Add-on to order |
$1.00/ea. | A1/A2/A3 |
A3 Weighted Shift Rod Conversion Kit |
$20.00 | A3 weight or A2 w/ A3 weight |
|
| SOLD OUT | SOLD OUT | $25.00 | A1 4-speed to 5-speed swap |
| A1 Relay Lever Shim Limited stock | A1 Relay Lever Shim Limited stock | $ 1.00 | A1 |
|
Neoprene
Washers - Can use 1 per ball stud Limited stock |
Neoprene
Washers - Can use 1 per ball stud Limited stock |
$0.75/ea. | A1/A2/A3 |
Notes:
-
For custom applications,
individual links are available for US$17.50/ea. for the rear and front
selector rods and US$20.00 for the forward shift rod.
- For example, if you already have a weighted shift rod you like, you could get just the front and rear selector rods for US$35.00
-
It is also possible to mix-n-match linkage parts (A1 vs. A2), for
example putting an A2 transaxle into an A1 vehicle.
- The linkage will be a mix of A1 and A2 parts, the selector rods will be the A2-style (since they are attached to the transaxle), the shift rod and relay shaft A1-style (since they are attached to the vehicle sub-frame).
- For the A3 platform, you can use the rear selector rod (US$17.50) and the main shift rod (US$20.00) from the A2 kit
- Replacement ball studs are only needed to replace ball studs on the factory linkage, for example on the transaxle selector shaft or the relay lever. You would need to drill out the old rusted ball stud (they are pressed in) and then bolt on the replacement stud
- While both the clamp-on and billet shift rod weights are listed above, you would only use one or the other, not both
- The adjustable short throw arm MUST be used with some form of ball stud shift rod, like the TSR or Missing LinkZ linkage (however the 2-position short throw arm can be used universally)
-
We try to have pre-built ordering buttons
for the commonly ordered parts combinations. But if you don't
see a bundled kit that includes the exact mix of parts you want, no
problem:
- You can order the separate items you want and the combined order will be shipped together and any excess postage will be refunded.
- Or if you want to place a single order, just make a list of the parts you want, add up the prices for those parts from the table above and select one of the shipping options noted here.
Again, if you don't see a pre-packaged combination of the parts you want, use the table above to put together the exact combination and price of the parts you want then contact MissingLinkZ and we can help you work out the details. Also, if you don't want to use PayPal, again contact MissingLinkZ and we'll provide you with other ordering arrangements, or consult the custom ordering section of the main MissingLinkZ web page, which has a complete list of ordering and shipping options
Here are some examples of various combinations possible with this shift kit:
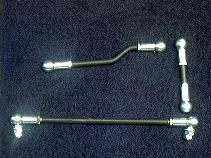
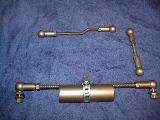
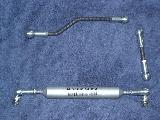
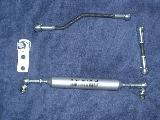
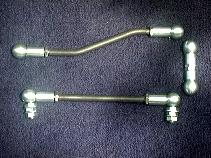
Hint, hold your cursor over the image of the kit you are interested in, and a description of the kit components and the cost will pop up, assuming your web browser supports the image ALT text label feature.In general, the "a" kits are the basic metal rod end shift linkage. The "b" kits add the clamp-on shift weight to the "a" kit. The "c" kits substitute the billet weighted shift rod instead of the clamp-on weight. The "d" kits add the short throw arm to the "c" kit. And finally, the "e" kits add the UHMW relay shaft bushings to the "d" kit.
We've SOLD OUT of these items.
Ships in Priority Mail flat rate envelope
After 25 years in operation, it's time to close up shop and move on to other adventures. Thanks to all the loyal customers over the years that helped to make this all possible. The web site will remain live.
 |
 |
 |
 |
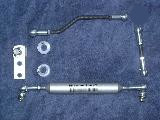 |
| A1a: SOLD OUT | A1b: - SOLD OUT | A1c: - SOLD OUT | A1d: - SOLD OUT | A1e: - SOLD OUT |
| A1a: - SOLD OUT | A1b: - SOLD OUT | A1c: - SOLD OUT | A1d: - SOLD OUT | A1e: - SOLD OUT |
We've SOLD OUT of these items.
 |
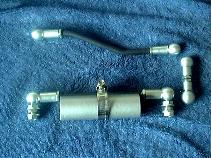 |
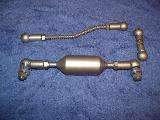 |
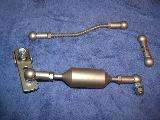 |
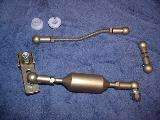 |
| A2a: - SOLD OUT | A2b: - SOLD OUT | A2c: - SOLD OUT | A2d: SOLD OUT | A2e: SOLD OUT |
| A2a: SOLD OUT | A2b: SOLD OUT | A2c: SOLD OUT | A2d: SOLD OUT | A2e: SOLD OUT |
Typical A3-020 Shift Kit Combinations:
We've SOLD OUT of these items.
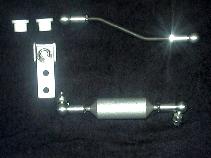
If interested in adding an all-metal, non-adjustable forward selector
rod (i.e. the short link) to any of the linkage kits below, see details here...
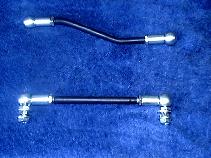 |
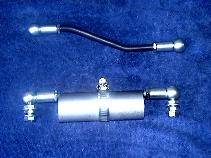 |
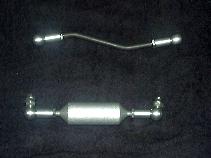 |
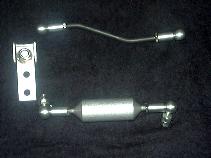 |
 |
| A3a: SOLD OUT | A3b: - SOLD OUT | A3c: SOLD OUT | A3d: SOLD OUT | A3e: SOLD OUT |
| A3a: SOLD OUT | A3b: SOLD OUT | A3c: SOLD OUT | A3d: SOLD OUT | A3e: SOLD OUT |
- Notes:
- Shipping via USPS Priority Flat Rate Envelope for the above kits to most major countries serviced by US Priority Mail service
- The Missing LinkZ components are all metal, aside from the pivot bushings on the relay shaft arm. All the shift rods are fully adjustable for length to allow for fine-tuning shifting performance.
- Billet weighted shift rod is machined out of one piece of cold rolled steel and weighs approx. 1.5 lbs. It adds mass to the shift linkage for improved operation in short throw applications.
- UHMW relay shaft bushings are more rigid than stock, for a more precise shift linkage operation.
- You can mix-n-match parts of this kit. The UHMW bushings work fine with the stock shift linkage, the short throw arm can be added, the shift weight can be clamped on. The solid shift linkage can replace the stock linkage. You are not limited to the combinations shown above, they are just examples of what can be done.
- Not pictured are any of the A2/3 kits(above) with the replacement UHMW relay shaft ball cover. It may be added to any of the A2/3 kits for an additional US$10.00
- See this section for some other kit combinations
- Don't see a pre-packaged kit with the exact combination of parts you want, no problem, send us an e-mail with a list of the items you are looking for.
Hint:
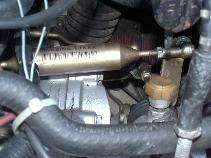
One of the key features of the Missing LinkZ shift linkage is that it is very flexible in the way it can be installed. When running a short throw shifter, the relay shaft end of the shift rod is moved closer to the engine block. However, in the stock configuration, the shift rod connects the back side of the selector lever on the transaxle (see lower left image). This tends to make the rod run at an angle, which in turn can make the shifting less precise and magnify any play in the linkage and end bushings. However, by simply flipping the ball stud to face towards the transaxle, instead of away from it, the shift rod is now in near perfect alignment with the relay shaft end. It not only looks better, it works better and costs nothing to do (see lower right image).
 |
 |
| Stock configuration | Rod on front of selector lever |
[Return to the top of this page]
Relay Shaft Bushings:
One of the critical parts of the VW shift linkage system is the relay shaft. Its purpose is to convert a front-back motion of the shift rod into a side-side motion of the arm at the end of the relay shaft. There is a boxed in bracket on the end of the shift rod into which a rubber-covered lever rides. The lever is attached to the relay shaft. Essentially, the rod pushes and pulls on the lever which causes the relay shaft to rotate which causes the end of the arm to push and pull on the selector shaft on the transmission itself.
The factory setup uses a pair of soft polyurethane bushings in the relay shaft bracket to hold the relay shaft rod vertical and allow it to pivot. Over time, the polyurethane bushings break down and split allowing the relay shaft to "rack" in the bracket, losing some of the shifter input motion, which leads to missed shift, say from 1st to 2nd gear. New factory bushings will help "tighten" up the relay shaft, to some degree. However, I found when I replaced mine, while it initially felt tight (at least less sloppy than with the worn out bushings) it still racked a bit. I could place one hand on the top of the relay shaft and manipulate the selector shaft rod and feel the racking.
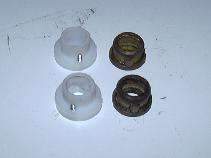 |
| UHMW-PE vs. stock bushings |
Not satisfied with the "squishy" polyurethane, I wanted to find a better solution. I've had extensive experience using a material known as Ultra High Molecular Weight Poly Ethylene (UHMW-PE). It is widely used in industrial applications as a bearing and wear surface material. It is a dense plastic, self-lubricating (like Teflon/PTFE but much less expensive), is resistant to most petroleum products, and can tolerate 200°F and higher temps. In the picture above, you can see the UHMW bushings on the left and the stock bushings they replace on the right. I had to make a few design modifications for the new material.
-
Since the bushing material is rigid, you can't "squeeze" it
into the bracket hole like the OEM polyurethane version. Instead, the
bushing it turned to the exact size of the hole. A radial slit can be
cut in it to allow it to be compressed a bit to fit into the hole. When
the relay shaft is inserted, it'll expand and lock into place in the
bracket.
- Alternately, to make the bushing fit tighter, you can slit the bushing radially with a fine blade saw, opposite the set screw, and then wrap the outside of the small section with electrical tape to pull the bushing ID inward. With the saw kerf removed, the ID of the bushing will shrink and the tape on the outside will increase the OD slightly. Repeat until the bushing fits snug but still allows for free relay shaft motion.
- A small screw serves to keep the bushing stationary in the bracket while the shaft rotates in the bushing.
We have observed minor variations in relay shaft diameters, some are 14mm, some aftermarket ones are 9/16" and they can vary between A1 and A2/A3-020 vehicles. So, I drill the center hole in the bushing to fit properly on the smallest OD shaft I've found. If it feels a bit tight on another shaft, it is a simple matter to use a file or a roll of sandpaper to slightly enlarge the bushing to fit properly. I also find that an application of a graphite or moly grease to the inside of the bushing helps both installation and initial operation.
These bushings are designed to fit A1, A2 and A3-020 vehicle applications, gas or diesel engine, 4- or 5-speed transaxles.
We've SOLD OUT of this item.
Order this replacement part on-line for US$15.00/pair plus shipping.
Ships in First class parcel
 |
 |
| SOLD OUT | SOLD OUT |
A2/A3 owners, see the A2/A3 Relay Shaft Ball Cover section for a special package.
[return to the top of this page]
After 25 years in operation, it's time to close up shop and move on to other adventures. Thanks to all the loyal customers over the years that helped to make this all possible. The web site will remain live.
Extreme Duty (Teflon) Relay Shaft Bushings:
We've SOLD OUT of this item.
For use with turbo-charged engines and/or high heat header applications
(especially on the A1 chassis - note
the exhaust down pipe about 2" from the relay shaft, we have
an extreme duty replacement pivot bushing made of Teflon
(Poly-Tetra-Fluoro-Ethylene or PTFE), which can operate to temps of
-350F to +500° F. This is 250° F higher than either the stock
polyurethane or UHMW replacement bushings. Bushings will be available
at a price of US$30.00/pr. and since Teflon/PTFE has a lower
coefficient of friction than UHMW (0.05 vs. 0.15) shifting is smoother
and lighter. Teflon/PTFE also has a much more pronounced slick or
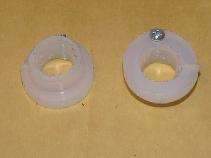
greasy feel to it. The Teflon bushings may appear as below, or may
be a solid, opaque white color, depending on the particular type of
Teflon used to mfg. the bushings. The above properties also apply to
the Teflon shift rod bearing as compared to the UHMW Shift Rod Bearing.
One additional note is that the Teflon material machines a lot smoother
than the UHMW material, so if visual appearance of the bushings is
important to you, by all means order the Teflon parts.
 |
 |
| Extreme Duty Teflon/PTFE bushings, - SOLD OUT |
Extreme Duty Teflon/PTFE bushings, - SOLD OUT |
These bushings are designed to fit A1, A2 and A3 vehicle applications, gas or diesel engine, 4- or 5-speed (020) transaxles.
[Return to the top of this page]A1/A2/A3 Shift Rod Bearing:
In the A1 chassis, there is one bushing that is located inside a steel bracket called the shift rod bearing. It is not designed for replacement without replacing the entire metal bracket (and that bracket is hard to find and even if found is very expensive: p/n 171.711.194G for the 5 speed linkage) at least until now! And don't make the mistake of purchasing an "orange" shift rod bearing for an A2 or A3 vehicle. It will not work in the A1 shift linkage very well as the A1 uses a ~14mm dia. shift rod and the A2/3 vehicles use a ~16mm dia. shift rod. The MissingLinkZ A1 shift rod bearing is sized to fit over the ~14mm A1 shift rod.
Note that the actual ID of the bearing is slightly larger than the nominal road dia. to allow for easy installation over the rod. The "rod" is actually made of a thin wall tubing and that can get slightly dented/bent over the years, thus the need for a slightly oversize hole. Unlike the soft polyurethane of the OEM shift rod bearing that can stretch to fit over the irregularities of the rod, the rigid plastic bearing needs to have a little bit of clearance to slide easily over the rod. We can supply a bearing with an inner diameter slightly smaller than the nominal rod dia. as a custom part. This would allow you to sand/file open the ID of the bearing to exactly fit your shift rod. Due to the nature of machining plastic, it is not possible to supply an exact diameter part. With plastic, you can take a certain size drill bit and drill a hole and you'll get a hole of a size close to that of the bit, but not exactly. And unlike metal, it is not possible to "ream" out a hole in plastic, if you try the plastic will just stretch around the reamer and not cut at all. This will happen as you use larger and larger size reamers until all of a sudden the plastic starts to cut and then you get a hole again approximately the size of the reamer but not exactly the same. Also, with the nature of the shift rod bearing in operation, it's two main motions are to allow the rod to move forward and back and to rotate. If the rod has a tiny but of side-side or up-down motion, this will not affect shifting since the mating parts of the linkage can accommodate the up-down and side-side motion as long as it is un the sub-mm range.
On the A2 and A3 chassis, there is a replacement "orange" bushing available, but it is prone to failure after a few years, probably due to its' proximity to the hot exhaust. Missing LinkZ has A2/3 sized shift rod bearings in UHMW and Teflon to replace the soft "orange" bushing.
Missing LinkZ is now offering an upgraded shift rod bearing designed to replace the worn out stock bearing while re-using your existing bracket. This results in a great cost savings over purchasing the entire bracket from the dealer and the replacement bushing is made from the same tough and slippery UHMW-PE or Teflon (PTFE) material as the relay shaft bushings for long-last and maintenance-free installation.
We have SOLD OUT of the shift rod bearings. If there's interest, we may be able to upload a 3D printable version of this part.
A1/New Style ('81+) Shift Rod Bearing:
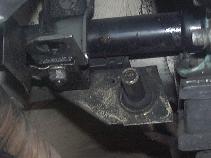 |
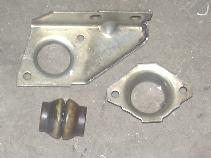 |
| A: Worn shift rod bearing | B: Bearing disassembled |
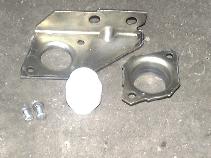 |
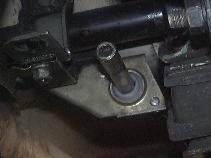 |
| C: New shift rod bearing | D: New bearing installed |
- Note:
-
The A1 shift rod bearing will work in the 5-speed bracket, the older
4-speed bracket (~'80 and older) uses a totally different part. It
should be possible to swap a 5-speed or newer 4-speed bracket in place
of the older 4-speed bracket if you want to install the upgraded shift
rod bearing on a 4-speed linkage. The older 4-speed bracket lacks this
spherical housing, it seems to be more of a flat plate with a hole and
a grommet surrounding the hole. The new style bracket is two pieces as
shown in photo B above and has a distinct bulge that housing the
spherical bearing.
A2/A3 Shift Rod Bearing:
For the A2 and A3 chassis, the shift rod bearing is contained inside the relay shaft tower. It is easiest to remove the tower from the vehicle and service it on the bench.
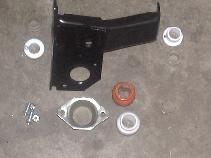 |
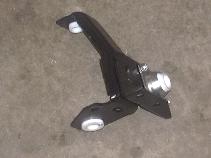 |
| A: A2/3 Shift Rod Bearing Install | B: A2/3 Shift Rod Bearing Installed |
Note: Pictures above shown with relay shaft bushings, they are not included in the shift rod bearing kit, but it is a good time to replace those bushings as well. Also, the stock bushings are shown (the pale white relay shaft bushings and the orange shift rod bearing) to illustrate the parts that are replaced and they are also not included in the kit. Also, on the A2 and A3 shifters, there is an identical bushing at the rear of the main shift rod, under the shifter base in the vehicle, that some folks have used this same shift rod bearing to replace. We do not have any pictures or instructions for this swap, but if you want to give it a try, order two shift rod bearings and have at it. And if anyone that has done that swap, please send us a picture or write-up on how you did it. The main issue there is that the bushing is inside the box under the shifter and is hard to get to. The OEM soft bushing can be easily squeezed to fit into the opening, but this rigid plastic bushing will need to have the box opened up to insert it in place. For A2/A3 shift rod bearing orders of qty. 2 or more, a US$5.00 discount on the additional shift rod bearings of the same type is applied with the BUY NOW buttons below. See this YouTube video for some basic information on how to remove the shifter box for access to this bushing. On top of this, you'll also need to open up the shifter box to install the rigid UHMW or Teflon bushing as they can't be squeezed into the hole like the soft OEM bushing.
On-line Ordering:
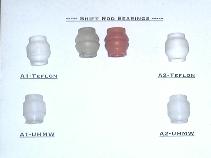
The only difference between the A1 and A2/A3 parts is that the A1 shift rod is a smaller diameter than the A2/A3 shift rod. As such, the hole in the middle of the bearing is sized accordingly. Pictured below are the stock A1 and A2/3 shift rod bearings (white and orange polyurethane parts, upper-center) and the replacement parts for each chassis in UHMW and Teflon/PTFE material. The Teflon/PTFE bushings are slightly larger and more spherical in shape that the UHMW bushings and so provide a slightly tighter fit inside the bracket.
Cost for the replacement shift rod bearing in UHMW is US$20.00, and in Teflon/PTFE, US$35.00, plus shipping: SOLD OUT Ships in First class parcel
Note: Shift rod bearing bracket shown for clarity only, it is not included with the kit, only the white UHMW bushing and the new fasteners are part of the kit. You re-use your existing bracket.Installation notes may be found here...
[Return to the top of this page]
A1/5-speed Relay Shaft/Lever Replacement Ball:
Now available is a replacement for the lever that attaches to the bottom of the relay shaft on the A1 shift linkage. Unlike the A2/3 part (below), the OEM lever has a rubber ball molded onto a steel lever that attaches to the base of the relay shaft. The rubber ball is not designed to be replaced and is subject to wear and tear being that is is located just inches from the hot exhaust.
One key feature of the lever is the precisely machined slotted hole that mates to the rectangular stud on the end of the relay shaft. If that is not a good fit (a common issue with after market replacement levers), the lever will fit loosely on the relay shaft. In that case, it will tend to work loose in use and eventually fall off. So it is critical that a good fitting lever be used. So, if you have a lever that fits well and the rubber ball falls apart, what do you do?
Simple, just cut off the old rubber ball (shown removed in far right image below) and press on a new tough replacement ball made of Delrin. The replacement ball is precision machined to exactly match the 30mm diameter of the stock 5sp ball and also to fit over the knurled end of the lever, shown in the far left image below. Note that some rare A1 vehicles have a ball of a diameter closer to 1"/25mm and also the 4-speed models likely have the smaller (~24mm) ball as well and the lever may also be shorter. The proper 5 speed lever is a shade over 3"(77.5mm) long. If this is the case on your vehicle, this part may require some modification (sanding it smaller or bending the ball cage larger) in order to fit it. And on '78 and older vehicles, there was only a simple o-ring on the end of the lever instead of the vulcanized rubber ball, so you can't use the Delrin replacement ball on that style lever. If you have a 5-speed transaxle in the vehicle and have these 4-speed linkage pieces remaining, you may want to consider swapping in the proper 5-speed relay shaft, lever and selector shaft that use the regular 30mm dia. ball. VW changed those parts between the 4-speed and 5-speed transaxles for a reason and likely you'll find improved shifting if you swap in the proper 5-speed parts. Note that the part we currently supply is designed to replace the 30mm dia. rubber ball version and if you have a relay lever with a smaller dia. ball, this part will not work without some modification.
And also note that on some vehicles, previous owners may have bent the ball cage inwards to compensate for a worn out ball. If this is the case in your vehicle, you can try and bend the sides of that cage out to fit the ball.
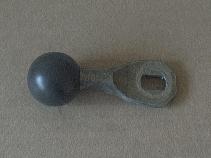 |
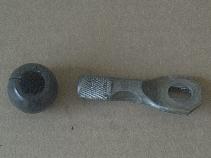 |
| A1 Lever Replacement Ball | Stock Rubber Ball Removed |
We've SOLD OUT of this item.
In this manner, you retain the good fit of the relay shaft lever that
you currently have and simply replace the worn out rubber ball end with
a tough, long lasting Delrin replacement. Order below, cost is US$15.00
plus shipping (relay lever shown below but not included). The add-on order
option below is for adding this item to a currently open order of other
shift linkage parts, it includes no additional postage. If you want to
order this item only, then select the US or International shipping options.
Ships in First class parcel
| A1/5-Speed: Relay Shaft Lever Ball - SOLD OUT |
A1/5-Speed: Relay Shaft Lever Ball - SOLD OUT |
A1/5-Speed: Relay Shaft Lever Ball - SOLD OUT |
[Return to the top of this page]
A2/A3 Relay Shaft Ball Cover:
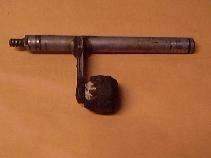 |
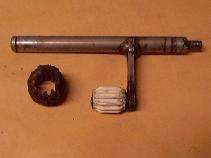 |
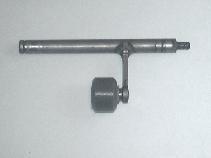 |
| A: A2/A3 Relay shaft w/ worn ball | B: Worn ball slit and removed | C: New A2/A3 bushing pressed in place |
The A2/A3 relay shaft is a little bit different than the A1. The same relay shaft bushings work just fine on the A2/A3 shaft. The A2/A3 relay shaft also has a two part ball that has a rubber cover molded over a nylon core that in turn is pressed onto a shaft welded to the middle of the relay shaft. Over time, the rubber outer ball cover deteriorates and falls apart. As it gets smaller, there is more and more play between it and the selector lever. In the extreme, the outer coating can disappear all together leaving nearly 1/2" of free play in the main shift rod, which is almost its full range of back and forth travel, so gear shifting is nearly impossible.
The ball cover is there to simply fill the space between the Nylon core and the steel cage. As such, it's sized to fill tht space. Owing to the difficulty of performing multiple maching operations on soft plastic, there may be slight variations in the symmetry of the cover. This has no affect on operation as the cover again is only there to fill the space in the cage. The combined core+cover will find it's preferred orientation in the cage and then just stay there. The ball assembly sits still and the relay shaft pivots inside the Nylon core. There used to be a company selling a ball cover that was shaped like a cube and it would not rotate at all. We chose to make our version roughly resemble the orignal part (roughly ball shaped). But the exact shape really matters not as the outside of the ball cover simply fills the space and is not a precise mechanical interface.
If your nylon core is worn from extended use w/o the original bal cover, we offer a full replacement ball in both UHMW and Teflon here...
- NOTES:
-
Relay shaft is not included with the ball cover kit
- Picture C shows a ball cover by itself to the lower left and installed, only one cover is included per kit.
- Actual ball cover is typically available in a gray colored UHMW instead of the white UHMW material as pictured
- See important fitment notes below...
- Picture C shows a ball cover by itself to the lower left and installed, only one cover is included per kit.
One option is to purchase a new relay shaft: VW p/n: 191-711-173B. However, if you would like to keep the existing relay shaft and just replace the worn part, we off a UHMW polyethylene cover that can be press fit over the inner nylon core, after first removing any remnants of the original outer cover. The new cover is cylindrical for a greater wear surface and with the self-lubricating nature of the UHMW-PE material, it should last for a very long time. It is resistant to motor oil and can tolerate the same temperature range as the original polyurethane compound. The ball cover is typically available in a gray colored version made of oil-filled UHMW, but that will vary depending on material availability. The physical properties of the two materials are the same.
This part is not currently available in Teflon since the nylon core is only rated to 200°F and it would not make sense to have a high temperature Teflon part on a low temperature nylon core. See the section below for a full Telon replacement ball if you need the .high temperature Teflon replacement ball.
We've SOLD OUT of this item.
By not replacing the existing relay shaft, the cost is less than
replacing the entire unit. It can be ordered on-line below for US$15.00
plus shipping (relay shaft pictured but not included)..
Ships in First class parcel. Limited stock:
|
A2/3 Relay Shaft Ball Cover US shipping |
A2/3 Relay Shaft Ball Cover Int'l shipping |
The above part fits over the existing nylon core on the relay shaft, after removing any remnants of the original rubber ball cover (if present). If the nylon core is damaged or even missing, you would instead want the full A2/A3 replacement ball kit, below.
We've SOLD OUT of this item.
Upgrade all the relay shaft bushings, including the UHMW ball cover and
the pair of bushings the shaft rotates in for US$25 (below left) or
upgrade to Teflon/PTFE relay shaft bushings for US$40 (below right).
Note, we are now using a gray oil filled UHMW material for the relay
shaft bushings and ball cover. The photos below were of the older parts
made of white UHMW. The gray UHMW offers lower friction and wider
temperature range than the white.
After 25 years in operation, it's time to close up shop and move on to other adventures. Thanks to all the loyal customers over the years that helped to make this all possible. The web site will remain live.
UHMW set - US$25.00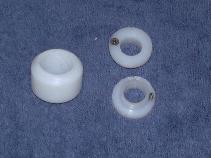 |
Teflon set - US$40.00 |
| SOLD OUT | SOLD OUT |
| ~~~~~ | ~~~~~ |
| SOLD OUT | SOLD OUT |
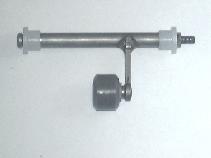 |
| A2/A3 Relay Shaft Bushing Set |
Interestingly, this must have been a good idea, since now other vendors have offered a similar part. Only difference we see is in the price :)
A2/A3 Replacement Ball:
If you are missing the relay shaft ball and inner core all together, a full replacement ball is also available alone and with relay shaft bushings. Also consider a full replacement ball if your nylon core is heavily worn outside or inside. Outer wear can come from running the linkage a long time after losing the rubber cover on the ball. Inner wear can be felt as a wobble or excessive play in the nylon core on the shaft that it sits on. Also, for non-standard size nylon cores (see fitment information above), the relacement ball is a good option.
We've SOLD OUT of this item.
In any case, the ball cover may not fit the outside of the core or the
resultant assembly will still be loose on the relay shaft. The
replacement ball is designed to fit over a 12mm outer diameter (OD)
pivot on the relay shaft and includes a 10mm inner diamter (ID) washer
to fit over the top part of the pivot pin that is peened up place to
hold the replacement ball on. The replacement ball is offered in both
the gray UHMW material and the higher temperature Teflon/PTFE material:
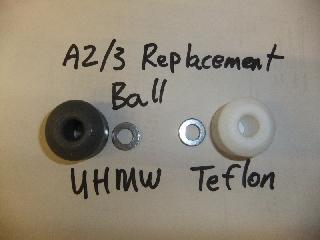 UHMW Replacement Ball: US$25.00 - Limited stock |
 Teflon Replacement Ball: US$55.00 - SOLD OUT |
| US Shipping | US Shipping |
| ---~~~~~~~~~~~~ | ---~~~~~~~~~~~~ |
| Int'l Shipping | Int'l Shipping |
We've SOLD OUT of these items.
And we have two combination kits below with either the UHMW replacement
ball and UHMW relay shaft bushings, or the new Teflon replacement ball
and Teflon relay shaft bushings to rebuild your OEM relay shaft to
better than new condition:
| UHMW Replacement Ball + Bushings: US$35.00 |
Teflon Replacement Ball + Bushings: US$80.00 |
| SOLD OUT | SOLD OUT |
| ---~~~~~~~~~~~~ | ---~~~~~~~~~~~~ |
| SOLD OUT | SOLD OUT |
>>> Contact us for more information or to order the UHMW (or Teflon/PTFE) relay shaft bushings <<<
[Return to the top of this page]Frequently Asked Questions:
Here are some common (frequently asked) questions (and answers) about the shift linkage kit MissingLinkZ makes. If you have questions and they are not listed below,ask them so we can add your answers for future readers. To use, read down the list of questions, below, and click on the one you are interested in an answer for:
- I want to purchase an "all inclusive" shift linkage kit, what do I order?
- Do I have to buy the whole kit?
- Will the clamp on weight work with the stock linkage?
- Will the relay shaft bushings work with stock or aftermarket relay shafts?
- Will the short throw shift arm work with the A3 weighted relay rod installed on an A2?
- Do I need to use your short throw arm with the solid linkage kit?
- Is there any downside to a short throw shifter?
- Why does the short throw arm only come with 2 reduction settings?
- Does the kit include *every* part of the shift linkage?
- Do I need to re-align my shifter after installing this kit?
- Some A2/A3 short throw shift kits use a shorter selector lever on the transmission, why do you use a longer arm on the relay shaft?
- I've seen similar shift linkage kits on the market, what makes yours different?
- Do the two short links utilize the existing ball studs and if so, what if mine are worn or rusty?
- Will this kit correct an improperly adjusted shift linkage?
- What material is the kit made of?
- Do the threaded rod ends come loose?
- Are there other companies that make shift linkage kits?
- Do you make anything for A3 and later vehicles?
- Can I make my own shift linkage kit?
- Does it matter what kind of oil I run in my transaxle?
- How do I place an order?
- How long will it take to get my order and how will it be shipped?
- A1, A2, A3, what's that all about?
- Are you still making and selling these shift linkage upgrade kits?
- Do you have any parts for a 4-speed to 5-speed transaxle swap?
- I'm swapping a transaxle from a different chassis into my vehicle, which type of linkage kit do I use?
- Does Missing LinkZ offer a heim joint version of the adjustable shift linkage?
We have a limited stock of items such as steering and driveshaft spacers, Bilstein shocks available. Let us know what item(s) you're looking for, where and how you'll want them shipped to and we'll get back to you with a shipping quote and purchase information:
| 4Crawler Offroad contact link | MissingLinkZ contact link |
- 1. I want to purchase an "all-inclusive" shift linkage kit, what do I order?
-
These "all-inclusive" kits contain those shift linkage parts
most commonly ordered for upgrading the stock linkage on A1, A2 and A3
vehicles, and include Priority Mail shipping:
- - A1/Mk1:
- - A2/Mk2:
- - A3/Mk3:
- - A1/Mk1:
After 25 years in operation, it's time to close up shop and move on to other adventures. Thanks to all the loyal customers over the years that helped to make this all possible. The web site will remain live.
| US Delivery | Int'l Delivery |
| US Delivery | Int'l Delivery |
| US Delivery | Int'l Delivery |
| SOLD OUT | SOLD OUT |
Ships in Priority Mail flat rate envelope
| SOLD OUT | SOLD OUT |
Add a UHMW Shift Rod Bearing to the A2 UHMW kit for US$125.00 + shipping:
| SOLD OUT | SOLD OUT |
For the A2 chassis, the A2 Teflon kit includes the same items as the A2 UHMW kit, swapping the UHMW Relay Shaft Bushing for Teflon:
| SOLD OUT | SOLD OUT |
Add a Teflon Shift Rod Bearing to the A2 Teflon kit:
| SOLD OUT | SOLD OUT |
The A3 UHMW Kit includes:
| SOLD OUT | SOLD OUT |
Add a UHMW Shift Rod Bearing to the A3 UHMW Kit:
| SOLD OUT | SOLD OUT |
For the A3-020 chassis (not for VR6/02A), the A3 Teflon Kit includes all the above, swapping the UHMW Relay Shaft Bushing for Teflon:
| SOLD OUT | SOLD OUT |
Add a Teflon Shift Rod Bearing to the A3 Teflon Kit:
| SOLD OUT | SOLD OUT |
- 2. Do I have to buy the whole kit?
-
No, this kit is designed so that any component will work by itself with
the remainder of the stock or most aftermarket shift linkage parts. For
example if you have the TSR solid rod end kit, pick up the relay shaft
bushings, short throw arm and weighted rod, either clamp on or billet.
If you have a Techtonics Tuning short throw kit, leave out the short
throw arm and add whatever components you want.
- Your "kit" will include the parts you want, see the pricing and options table, here. So, this brings up a related question, what parts do you need? A lot depends on what you are looking for. If you want the biggest bang for the buck, replace the relay shaft bushings and on the A2/A3, the golf ball bushing. Doing these will eliminate all the play from those parts and restore everything to near factory-new feel. And, unlike the stock bushings, the UHMW (or Teflon/PTFE) bushings should remain tight for years. If you are looking to upgrade the performance of your stock linkage, then look to other parts of the Missing LinkZ package. If you want a shortened throw on the shift lever, the short throw shift arm is what you need. If you want a more solid feeling shift, the weighted shift rod is in order. If you want a fully adjustable linkage with all-metal components, then the spherical rod end Missing LinkZ linkage is what you need.
- Another option is to upgrade parts one step at a time, do the bushings first, then if you are happy with the results, you may find some other aspect of the shift linkage is now in need of attention.
- Your "kit" will include the parts you want, see the pricing and options table, here. So, this brings up a related question, what parts do you need? A lot depends on what you are looking for. If you want the biggest bang for the buck, replace the relay shaft bushings and on the A2/A3, the golf ball bushing. Doing these will eliminate all the play from those parts and restore everything to near factory-new feel. And, unlike the stock bushings, the UHMW (or Teflon/PTFE) bushings should remain tight for years. If you are looking to upgrade the performance of your stock linkage, then look to other parts of the Missing LinkZ package. If you want a shortened throw on the shift lever, the short throw shift arm is what you need. If you want a more solid feeling shift, the weighted shift rod is in order. If you want a fully adjustable linkage with all-metal components, then the spherical rod end Missing LinkZ linkage is what you need.
- 3. Will the clamp on weight work with the stock linkage?
- Yes, it'll clamp right on to the stock relay rod or even to the Missing LinkZ shift rod.
- 4. Will the relay shaft bushings work with stock or aftermarket relay shafts?
- Yes, they are designed to work with the stock relay shaft or with common aftermarket shift kits. Certain kits have slightly oversize relay shaft and may require sanding or filing the hole in the bushings a bit to fit the larger shaft.
- 5. Will the short throw shift arm work with the A3 weighted relay rod installed on an A2?
- Yes it will, just slip the A3 weighted rod into the desired reduction hole on the arm and you are set, the A2 and A3 relay rods are the same length. The A3 rod is available from VW for about US$30.00, P/N: 1H0-711-183. If you would like to have an A3 weighted rod adapted to use the spherical rod ends, it is a simple matter to cut M8-1.25 threads on the end of the A3 weight rod and install a set of rod ends on it. The ball studs and socket ends to do so will cost US$15 plus postage. You cut off the bent ends of the A3 rod, then thread the ends and screw on the jam nuts and rod ends. You may need to trim a little off the threaded ends of the rod ends if the overall length comes out too long. The steel of the rod can be a little hard, so be sure and use a god quality threading die, an inexpensive carbon steel die may not "cut it" :). If you lack the tools to do this, MissingLinkZ can modify your A3 weighted rod for US$25.00 plus return postage (includes parts and labor). Contact us for details.
- 6. Do I need to use your short throw arm with the solid linkage kit?
- No, it is not necessary to use the short throw arm. It is an optional item, some people like the stock shift motion, while others prefer a shorter throw. The bolt-on arm only shortens the front-back shift lever throw (by approx. 25% or 50%) but leaves the important side-side (gate) motion the same. The linkage kit will work just fine with most aftermarket short throw kits as well, here it is shown with the Tectonics short throw arm.
- 7. Is there any downside to a short throw shifter?
-
- The shortened throw does place more load on the relay shaft pivot
bushings. You'll want to replace the bushings with the short throw kit
if yours are worn. Depending on the degree of reduction, you may find
the stock polyurethane bushings just won't hold up to the stress and
will wear out and become sloppy in short order. The heavy duty replacement bushings
were designed to hold up better in this application.
- - Any play in the shift linkage will be magnified by the degree of shift throw reduction (e.g. at 50% reduction, play is multiplied by 2X), so a nice tight shift linkage is critical for proper operation.
- Finally, the short throw shift arm can change the angles on the forward shift rod to some degree. While a short throw shift kit can work with the stock style linkage, using a fully adjustable linkage can allow for a better shift linkage alignment.
- On a related question, what are the benefits to a short throw shifter? In my A1 diesel, I find it is mainly an ergonomic benefit. I no longer have to lean up and out of the seat to shift into 3rd or 5th gears. Also, shifting is more relaxed, a short throw on the lever gives the desired effect at the transaxle. Having a tight linkage means gear selection is precise. I recall one road trip when I drove 600 miles on the Alcan Highway in one day. By the end of that day, my right arm was so tired from shifting I could hardly get it into 5th gear. If only I would have had a short throw shifter that day, life would have been so much better! The short throw shifter is designed to do just that, shorten the throw of the shift lever in the cab. The transmission linkage inside the transaxle is still doing the same thing to shift gears, so the short throw shift kit will not make your transaxle shift gears any faster than before (won't make it any slower either). You may need a little time to adjust to the shortened throw, which is why I recommend you start at a low reduction for a week or so. Trying to slam and jam the shifter (like you did with the worn out, sloppy linkage you used to run) with a nice, tight shortened throw setup can put undue wear and tear on the transaxle, you need to develop a feel for how fast to move your arm to shift gears with the new setup.
- - Any play in the shift linkage will be magnified by the degree of shift throw reduction (e.g. at 50% reduction, play is multiplied by 2X), so a nice tight shift linkage is critical for proper operation.
- 8. Why does the short throw arm only come with 2 reduction settings?
- We selected two reduction levels that we felt offered a significant difference over the stock setting. However, if you want to choose from a range of settings, try the new adjustable short throw arm.
- 9. Does the kit include *every* part of the shift linkage?
-
No, it does not. I've chosen to include the parts of the linkage that I
feel are under designed or lacking features. Parts I don't include are
those that the stock VW part is fine, for example the lever on the A1
relay shaft (black rubber part). If it is worn, get a new one from VW.
On the A2/A3 linkage, I now make a replacement for the ORANGE shift rod bearing on the main
shift rod. If this needs replacing, an A2/A3
bushing replacement kit should cost under US$10 and includes this part.
Or you can purchase the upgraded shift
rod bearing for the A1/A2/A3 linkages in a choice of materials.
- Due to popular request, we do offer an improved replacement bushing for the A2/A3 relay shaft ball cover. Finally, this kit doesn't include any of the parts related to the shift lever itself. A common part to wear out on the A2 and A3 vehicles, especially due to the added stress applied trying to shift with a worn linkage, is the ball and socket under the shift lever itself. As it wears, the ball sinks lower in the socket until the reverse lockout no longer is functional. Here is some information on replacing this part. On the A1 vehicles, there are no re-buildable parts in the "Shift Lever Pivot Assembly", so the entire unit typically must be replaced if it is worn.
- 10. Do I need to re-align my shifter after installing this kit?
-
If it was aligned properly before, it'll be aligned properly
afterwards. If it was misaligned, then it will need to be aligned to
work properly. If you are replacing the shift rod bearing as part of
the kit installation, you will need to re-align the linkage since you
have to separate the clamp from the shift rod to replace the bearing. A
few tips can make the re-alignment easier. First, try to mark the
position of the clamp on the shift rod, both the depth is is pushed
onto the rod as well as the vertical alignment. Then you might try
measuring the clearance to the reverse lockout finger under the shifter
to see where it is aligned to and to familiarize yourself with what the
proper alighment looks like.
- The alignment procedure varies with vehicle type, consult a good repair manual for the procedure:
- Here is a fairly good discussion of the A1 alignment procedure: http://www.mikegabriel.net/vw/badhabitrabbit/shifter.html In short, set the shifter base reverse lockout finger clearance to 15mm on a 5-speed and 20mm on a 4-speed.
- On the A2/A3 linkage, the adjustment of the shifter itself is made easier with a special tool, p/n 3285. Here is a 150 DPI scan of the tool, that if printed at the same resolution will yield a useable copy.
- The alignment procedure varies with vehicle type, consult a good repair manual for the procedure:
- 11. Some short throw shift kits use a shorter selector lever on the transmission, why do you use a longer arm on the relay shaft?
-
Technically, either approach will work. But MissingLinkZ chose the
longer arm for a number of reasons.
- - One is for ease of installation. No need to remove parts from the transmission, instead the arm extension is easily clamped to the relay shaft in place, from the top.
- - Also, by lengthening the relay shaft arm, you preserve the amount of shift rod motion, thus minimizing the effects of play in the linkages. On a shortened selector shaft, any play in the mechanism up to that point is magnified by the shortness of the arm.
- - Also, by maintaining the shift rod range of motion (and thus speed) the application of weight to the rod is more effective. The momentum of the rod motion (with weight) helps overcome the loss of leverage (due to the shorter shift lever motion) and makes shifting smooth and crisp.
- - Finally, the same part works just the same on A1 or A2/A3 linkages, the shortened selector lever won't work on the A1 linkage.
- - One is for ease of installation. No need to remove parts from the transmission, instead the arm extension is easily clamped to the relay shaft in place, from the top.
- 12. I've seen similar shift linkage kits on the market, what makes yours different?
-
It is one of the most complete and flexible kits available.
- All the links are fully adjustable for length and orientation. While this may make a bit more work to install the links (setting the lengths to match the old links) it allows for fine tuning shifting operation to make up for variations in your shift linkage.
- There are no welded parts in the linkage, aside from the threaded stud welded into the short throw arm. By making the parts from one piece of material, possible brittleness of welded joints is avoided.
- All joints are purely mechanical. This eliminates most of the wear prone bushings in the system. This ensures your shifting will be just as crisp years from now as it is the day you install it.
- You can mix and match almost any combination of components to build a kit to suit your exact needs.
- basic Where possible, we also try to retain as much of the stock linkage as possible to save on manufacturing costs which is passed along to the end user.
- The parts are designed purely for functionality, strength and durability. You won't find any chrome plating here :-)
- All the links are fully adjustable for length and orientation. While this may make a bit more work to install the links (setting the lengths to match the old links) it allows for fine tuning shifting operation to make up for variations in your shift linkage.
- 13. Do the two short links utilize the existing ball studs and if so, what if mine are worn or rusty?
- Yes, the links do utilize the existing 13mm ball studs. If the existing studs are worn out or rusted due to lack of lubrication, MissingLinkZ offers replacement studs. Installation requires removing the existing part to drill out the worn ball stud and then bolting in the replacement stud. It uses a 5/16" hole and include nut and lock washer to secure it in place of the old stud.
- 14. Will this kit correct an improperly adjusted shift linkage?
-
The VW shift linkage is a complex mechanical system. The MissingLinkZ
kit replaces the last links before the transaxle, but if the linkage
motion is not correct coming to the end links, they can only transmit
the incorrect motion.
- Other sources of adjustment in the linkage include the proper indexing of the shift rod on the shift rod clamp. If you disassemble this component, be sure to make an alignment mark to aide in proper reassembly.
- Another alignment item is the shift lever base and the floor pan of the vehicle. There are two alignment holes in the lever base that should be aligned to, ensuring that the lever throw is in line with the shift rod below.
- Finally, the front-back centering of the shift lever in the shift gates under the lever can be adjusted by sliding the shift rod in the clamp. There is a web page with detailed troubleshooting and alignment information:
- - http://www.mikegabriel.net/vw/badhabitrabbit/shifter.html.
- Customer Sam Ross wrote up these linkage alignment tips as part of his 4-sp to 5-sp conversion project. These instructions are to accompany and clarify the Bentley shop manual text and diagrams: Docs/A1basicShifterLinkageInstructions.pdf.
- Other sources of adjustment in the linkage include the proper indexing of the shift rod on the shift rod clamp. If you disassemble this component, be sure to make an alignment mark to aide in proper reassembly.
- 15. What material is the kit made of?
- The shift rod weights are made of short throw arms are made of mild steel, the spherical rod ends are zinc plated steel and the threaded rods are stainless steel. Relay shaft pivot bushings are made of either Ultra High Molecular Weight PolyEthylene (UHMW-PE) or Teflon/PTFE (PTFE). We paint the bare steel parts of the linkage with a hammered silver engine enamel to prevent rust. You can paint over this if you want another color or let us know if you want unpainted parts if you wanted to plate or powder coat the bare steel.
- 16. Do the threaded rod ends come loose?
-
I've been running one version or another of this setup for over a year
and have yet to have any rod end work loose. If the jam nuts are
properly tightened against the rod ends they should not work loose.
I've been running my linkage on a diesel engine vehicle (with worn out
motor mounts no less - so I know vibration:) and not one problem. If
you want to be extra secure, once you have the linkage adjusted to the
proper length for your vehicle, you could use a thread locking compound
on the jam nuts, just back them off, apply a drop of thread lock and
tighten them up again. Or for the ultimate in staying power, you could
try tack welding the nut and rod end to the threaded rod. The rod ends
also feature a spring steel safety clip that mechanically retains the
rod end on top of the ball stud.
- Or, if you prefer the stock linkage, you can use it along with the short throw arm, clamp on weight and improved relay shaft bearings, your choice.
- 17. Are there other companies that make shift linkage kits?
-
Yes, here's some we've run across (in alphabetical order):
- - AutoBahn Designs (ABD Racing)
- - Autotech
- - Eurosport Accessories
- - Neuspeed
- - Techtonics Tuning
- - TSR Performance
- - AutoBahn Designs (ABD Racing)
- 18. Do you make anything for A3 and later vehicles?
-
Some A3 vehicles use nearly the identical shift linkage as the A2 does,
except for the front selector rod, which is just too short to adapt to
the solid rod end style linkage. So, the Missing LinkZ kit can supply
everything but that part for the A3, this is why the A3 kits are
US$15.00 less than the corresponding A2 kits. We can make, by special
order, an all-metal forward selector rod for the A3 vehicles using the
rod ends and threaded rod. However, due to the short length, we need to
weld the rod ends to together for strength as there is only a thread or
so holding each one in place. As such, the rod is not adjustable in
length, but you can adjust the rear selector rod if needed. The cost
for this link is US$25.00, so add that cost to any A3 linkage kit to
get this welded forward selector rod added, image of
the custom A3c kit.
- If in doubt whether your A3 is a linkage or cable shifted setup, pop the hood and look. Or look at the transaxle code on the bottom of the bell housing. There you will see if you have an 020 (linkage shifted) or 02A (cable shifted, used with the VR6 engine) transaxle. For later vehicles that use a cable style shifter, Missing LinkZ doesn't have a solution for that. One good option can be found at:
- - Diesel Geek
- If in doubt whether your A3 is a linkage or cable shifted setup, pop the hood and look. Or look at the transaxle code on the bottom of the bell housing. There you will see if you have an 020 (linkage shifted) or 02A (cable shifted, used with the VR6 engine) transaxle. For later vehicles that use a cable style shifter, Missing LinkZ doesn't have a solution for that. One good option can be found at:
- 19. Can I make my own shift linkage kit?
- Yes, that's how I made mine. After not finding all the components in any one kit, I designed and built my own. You can get the rod ends, the safety clips, the jam nuts, the threaded rod, some tools to cut and bend it, the ball studs, the washers and nuts to attach them to the stock linkage. If you have access to a metal cutting lathe and milling machine, you can machine some rod for the weights, and make some bushings to tighten up the relay shaft. If you need any of the component parts, Missing LinkZ can supply any items you can't locate on your own.
- 20. Does it matter what kind of oil I run in my transaxle?
-
VW recommends a gear oil with a GL-4 rating. One that I have found is Redline manual transmission
oil. I've used both MTL and MT-90. I prefer the lighter MTL for the 020
transaxle, while MT-90 is a better match for the 02A transaxle.
- The proper weight and grade gear oil will greatly improve shifting while moving. Running the proper gear oil allows the syncho-mesh rings to do their job better to speed up or slow down their gears to mesh properly for easier shifting. With gear oil, a bigger number (as in GL-5) is not always better, a really good GL-5 oil may be too slippery for the synchros to work properly, making shifting slower, and the extreme pressure (EP) additives in GL-5 may attack some of the bronze components in the transaxle.
- Some signs of incorrect gear oil include sluggish shifting when the transaxle is cold and noticeably different delays engaging various gears. For example if it takes longer to shift from 1st to 2nd gear compared to shifting from 2nd to 3rd gear, this could indicate the synchros are having trouble spinning 2nd gear up to speed.
- So, how much oil do you need? Ideally, you need 2 liters to refill an 020 transaxle, or four ounces over 2 quarts. I like to keep some gear oil on hand, so get 3 quarts and then you'll have some to top off the gear box if needed. On most of the early 020 transaxles (made prior to 1987) the "fill" plug is too low on the transaxle case for a proper fill level check. That is the oil will begin to drain out of the fill plug at about 1.5 liters. The plug must then be installed and the remainder of the gear oil is poured in the top of the gear box.
- IMPORTANT: Low gear oil levels is the #1 cause of transaxle noise and popping out of 5th gear and of 5th gear failure, so make sure the gear oil level is proper.
- Speaking of drain plugs, here is a handy tool to help you remove and install those pesky 17mm hex socket plugs...
- The proper weight and grade gear oil will greatly improve shifting while moving. Running the proper gear oil allows the syncho-mesh rings to do their job better to speed up or slow down their gears to mesh properly for easier shifting. With gear oil, a bigger number (as in GL-5) is not always better, a really good GL-5 oil may be too slippery for the synchros to work properly, making shifting slower, and the extreme pressure (EP) additives in GL-5 may attack some of the bronze components in the transaxle.
- 21. How do I place an order?
-
In most cases, just click on the "Buy Now" button located
near the item you wish to purchase. If there is not a "Buy
Now" button for the item(s) you want, just send
us an e-mail and tell us what type of vehicle you have (A1, A2
or A3), and what parts you would like to order and we'll get you a
price quote and list of payment options.
- If you are unsure what parts you need, feel free to contact us to discuss you application. The majority of the kits we've built are a custom mix of parts to work with specific applications. If you already have some components of your shift linkage upgraded, we can build you a kit around those parts.
- All the "Buy Now" buttons use PayPal, the ID is Sales@MissingLinkZ.com which will direct funds to the company's (Visual Diagnostics LLC) PayPal account. Other payment options are available, contact MissingLinkZ for details.
- If you are unsure what parts you need, feel free to contact us to discuss you application. The majority of the kits we've built are a custom mix of parts to work with specific applications. If you already have some components of your shift linkage upgraded, we can build you a kit around those parts.
- 22. How long will it take to get my order and how will it be shipped?
-
We try to send a confirmation e-mail for all orders we receive within
24 hours of our notification. If you don't receive a confirmation
e-mail, please feel free to contact us (sales@MissingLinkZ.com) with
your copy of your order confirmation in case we did not receive our
copy, as happens from time to time. Allow 1 -2 weeks for your custom
shift linkage kit to be fabricated, depending on order backlog. We hand
craft each and every kit to get you the exact parts you require. While
it would be great if we had a huge warehouse stocked with heaps of
every single component we need, we don't. Problem is when you have a
warehouse like that, you usually only can afford to stock the big
sellers. So those items that are only ordered a few times a year get
dropped from the product line. We would rather be able to offer those
really hard to find items and we still spare parts for our original
linkage kits first designed and built back in 2000-1 time frame.
- MissingLinkZ ships the larger kits via US Priority Mail, 2-3 day delivery time from zip code 94088 (California, USA) with delivery tracking. Smaller parts go via First Class mail (~5 days typical delivery time) unless otherwise specified. International shipments go via US Airmail or Priority Mail International with 6-10 day delivery time. With USPS shipping, there is no facility to pre-pay any customs or import duties on your parcel. As such, if there are any fees due, those must be paid by the customer at receipt of the item.
- For orders placed via Paypal, they will be shipped to the address specified in the Paypal transaction notice.
- Please be sure to DOUBLE CHECK the shipping address before placing the order. Incorrect addresses will delay the delivery of your order and any re-shipment cost will be paid by the buyer. Normally this is the Confirmed (or unconfirmed) shipping address that you select when placing the order via Paypal (which is what Paypal requires us, as a seller, to do to be covered by their Seller Protection policy). If you wish the package to be sent to a different address, you can add that address to your Paypal account or put it in the Note field in the Paypal order screen. If you send an alternate address in a separate e-mail, it may difficult to associate it with your Paypal order, especially if you use 2 or more different e-mail addresses.
- If possible, a delivery tracking number will be furnished. Insurance is not included, if desired, it is available at an extra cost. Expedited shipping options are also available at an additional cost (Express Mail), cost for Express Mail shipping runs US$23.95 to domestic and US$68.95 for international destinations. For uninsured shipments that are either lost or mis-delivered by the post office, replacement parts can be reordered at a discounted price (parts cost less 10%). For international shipments, the supplied tracking number may or may not be scanned along the way, so may not update on the usps.com tracking web site. If you desired a fully trackable international shipment, the above Expedited Shipping method is recommended, contact MissingLinkZ for details. In the event a Delivery Confirmation or other tracking number indicates that the package has been delivered, but you have not received the part, consider taking the tracking number to the post office to see if they can trace the item.
After 25 years in operation, it's time to close up shop and move on to other adventures. Thanks to all the loyal customers over the years that helped to make this all possible. The web site will remain live.
- MissingLinkZ ships the larger kits via US Priority Mail, 2-3 day delivery time from zip code 94088 (California, USA) with delivery tracking. Smaller parts go via First Class mail (~5 days typical delivery time) unless otherwise specified. International shipments go via US Airmail or Priority Mail International with 6-10 day delivery time. With USPS shipping, there is no facility to pre-pay any customs or import duties on your parcel. As such, if there are any fees due, those must be paid by the customer at receipt of the item.
- 23. A1, A2, A3, what's that all about?
- These are VW Chassis Codes, this list should assist you with what vehicles are included in each production run. These shift linkage kits are designed for the A1, A2 and some of the A3 platform vehicles.
- 24. Are you still making and selling these shift linkage upgrade kits?
- No, we've stopped making our shift kits but have uploaded many of the designs here so you might try making your own. That's how we got started.
- 25. Do you have any parts for a 4-speed to 5-speed transaxle swap?
- You bet. There are some linkage differences between the 4-speed and 5-speed transaxles. Most of them can be handled with any of the adjustable 5-speed linkage kits. If you are unable to get the 5-speed rear selector rod to work with your 4-speed linkage, there is no problem re-using the existing 4-speed rear selector rod, especially if you plan to upgrade to a 5-speed transaxle at a later date. An additional difference is the length of the selector lever in the two setups. In order to get increased side-side throw for the wider 5-speed shift pattern, the selector lever in a 5-speed linkage is approx. 2" longer than that of the 4-speed shift linkage (approx. 120mm center-center). You can grab the longer lever from the 5-speed donor vehicle or a bolt-on extension is available from Missing LinkZ, the extends the length of the 4-sp. (~4" / 100mm) selector lever approx. 2" / 50mm to match the longer (~6" / 150mm) 5sp part. See the pricing section for ordering information (A1 Selector Lever Extension). This extension will allow the 4sp lever to "reach" the wider R, 1-2, 3-4, 5 gear shift range on the 5sp transaxle. However, the 4sp. selector lever is set up for a ~24mm dia. ball and shorter lever on the relay shaft as compared to the ~30mm dia. ball and longer relay lever on the 5sp. linkage. Therefore, most folks recommend getting the 5-speed gear shift assembly and the long shift rod connected to it from the donor vehicle, although we've have heard of folks being able to re-use the 4-speed shifter, although you might want to get a 5-speed shifter knob available from a variety of sources. Likewise, if you plan to upgrade to a UHMW or Teflon shift rod bearing, you'll need the shift rod bearing bracket from the 5-speed vehicle as it can be repaired unlike the 4-speed bracket. Also, the relay lever (part with the black rubber ball on the end, is longer on the 5-speed linkage. You can get one of those from a junkyard or in a generic shifter rebuild kit. You'll also need the driver's side transaxle mount for the 5-speed donor as that part is different than the 4-speed mount. And the shift lever alignment dimension in the 5-speed shifter.
- 26. I'm swapping a transaxle from a different chassis into my vehicle, which type of linkage kit do I use?
- Well, to answer that question, you'll need to understand a few fundamentals and then decide for yourself. So assuming you are swapping a linkage-shifted (020) transaxle from and A1/A2/A3 vehicle into a different A1/A2/A3 vehicle, realize that any 020 transaxle will work with any type of shift linkage. And there are parts of the linkage that attach to the chassis (like the shifter and the shift rod bearing and relay shaft brackets) and there are parts of the linkage that attach to the transaxle (like the relay lever and selector levers). So, you'll need to use all of one type of linkage setup or the other, that is make the new transaxle brackets match the transaxle that you are removing. Or you need to match the chassis brackets on your recipient vehicle to the donor vehicle. Unless you plan on making significant modifications to adapt the different chassis brackets (especially in going from an A2/A3 into an A1), the easiest route would be to move all the A1 transaxle brackets to the A2/A3 transaxle. Then you would use any of the A1 shift linkage parts if you want to upgrade. Here is some 020 transaxle information showing the selector lever and relay lever bracket mounting bolt hole.
- 27. Does Missing LinkZ offer a heim joint version of the adjustable shift linkage?
-
Sure, we have two options that have been available for special order
since 2006, click here for a photo
of a heim joint Missing LinkZ shift linkage. Retrofitting the
stock linkage to heim joints is more involved than just installing the
ball stud rod ends that are used in our adjustable linkage kits. Since
the metal rod ends used in our regular linkage kits are designed to fit
over the OEM ball studs, there are no modifications to the stock shift
linkage to install the Missing LinkZ adjustable linkage. But for the
heim joints, you must remove various parts of the factory linkage and grind/drill
out the 4 factory ball studs (they are pressed and welded in
place) in order to install the bolts required for the heim joint rod
ends. Missing LinkZ offers two options for customers wishing to use a
heim joint style shift linkage:
- 1: For heim joints to replace the ball stud rod ends we can supply a DIY kit that you can use to retrofit an existing shift linkage kits. That kit costs US$20.00 per shift linkage rod, so for a full set of 3 shift linkage rods, the cost would be US$60.00. Note that the heim joint rod ends are a little longer than the ball stud rod ends so you might need to trim one or more of the existing threaded shift rods (or billet weight) in order to match the new shift rod length to the factory lengths. Also, for the A2 linkage kits, the short forward selector rod will require a match male-female pair of heim joints due to the shorter length, so be sure to let us know if the retrofit kit is for an A2 linkage.
- 2: A second option is that you can request heim joints and installation hardware to swap out the ball stud rod ends on a new linkage kit. Cost for this option is US$15.00/shift linkage rod or US$45.00 in addition to a full 3-rod linkage kit.
- Contact Missing LinkZ for information on the heim joint retrofit kits. Since we have so many options and kits and don't wish to further confuse the customers with more choices, we have chosen to offer the heim joint kits as custom orders, those may be placed as noted here...
- 1: For heim joints to replace the ball stud rod ends we can supply a DIY kit that you can use to retrofit an existing shift linkage kits. That kit costs US$20.00 per shift linkage rod, so for a full set of 3 shift linkage rods, the cost would be US$60.00. Note that the heim joint rod ends are a little longer than the ball stud rod ends so you might need to trim one or more of the existing threaded shift rods (or billet weight) in order to match the new shift rod length to the factory lengths. Also, for the A2 linkage kits, the short forward selector rod will require a match male-female pair of heim joints due to the shorter length, so be sure to let us know if the retrofit kit is for an A2 linkage.
[Return to the main VW page....]
Visitor # 383215 since 28.AUG.2001
[Last updated: Friday, 14-Feb-2025 21:49:35 GMT]

